Showing posts with label Cakes. Show all posts

Sunday, December 9, 2012

William Sonomas: sour cream chocolate bundt cake


The beauty of this bunt cake intrigued me, the simplicity of the baking method and the ease had to be  put to test. This recipe from the Williams -Sonoma's need a very special occasion and I waited for mine at Thanksgiving. This being the first time with  bunt, it sort of was a failure as tiniest part of the cake was not released as easily as it should have.  When I finally managed to nudge it  gently out of the pan, my next bet was to attach the cake with the icing (which looked more fudge-ish than  smooth flowing icing) which apparently was too thick and made the cake only heavier and more fragile than ever.
All looked fine until I had to load it with more icing on top and transfer it to  a beautiful plate which was another disaster in itself. Never in the past have I been so disappointed with my baking skills. After some pep talk from my hubster, I reluctantly packed the not-so-beautiful looking bunt to the Thanksgiving dinner hosted this year at my cousins at NY. I was able to retrieve only about 2/3rd of the bunt which my family relished happily  and the crumbled 1/3rd was put to the best use which eventually turned into a trifle with cake pieces, whipped cream, fudge and M&M on the top. The kids, mine and my sisters begged for seconds and thirds and it was the biggest hit of all the desserts I made for that day.


Now, I'm here to tell you that I later decided to give this recipe a second chance only because it was the moistest cake (duh, it didn't hold it's shape, remember?) that I made ever in my 12 years of baking and I got a big thumbs up from Dear H (who is not that much of a cake-eater). So I promised myself to make this for my Dear Hubby's surprise party. ( More cake pics  from the party at the bottom) Boy, am I glad that I did! He absolutely loved it and was singing praises for me. So, here's the praise worthy, melt in your mouth kinda cake recipe.

Sour Cream - Chocolate Bundt Cake from Williams-Sonoma

For the cake:
    2 1/4 cups all-purpose flour 2 1/2 sticks unsalted butter
    2 1/2 cups firmly packed light brown sugar
    5 eggs lightly beaten
    1 1/2 cups sour cream
    1 1/2 tsp baking soda
    1 1/4 tsp kosher salt
    4 tsp vanilla extract
    1 1/2 cups semisweet chocolate chips

    1 cup cocoa powder, sifted, plus more for dusting pan
    7 1/2 oz. semisweet chocolate, finely chopped
    1 cup boiling water

For the ganache:

       6 oz. semisweet chocolate, finely chopped
       2 Tbsp. unsalted butter
       1/2 cup heavy cream

Have all the ingredients at room temperature.

Preheat an oven to 325 degrees F. Grease the Anniversary Bundt Cake Pan with butter and dust with cocoa powder; tap out the excess.

To make the cake, in a bowl, combine the 1 cup cocoa powder and the chocolate. Add the boiling water and whisk until the chocolate melts and the mixture is smooth and blended. Set aside.

Over a sheet of parchment, sift together the flour, baking soda and salt. Set aside.

In the bowl of an electric mixer fitted with the flat beater, beat the butter on medium speed until smooth and creamy, one minute. Reduce the speed to low, add the brown sugar and beat until blended. Increase the speed to medium and continue beating until the mixture is light and fluffy, about 5 minutes, stopping the mixer occasionally to scrape down the sides of the bowl. Add the eggs a little at a time, beating until incorporated before adding more and stopping the mixer occasionally to scrape down the sides of the bowl.  Add in the vanilla.

While still at  low speed, add the flour mixture in three additions, alternating with the sour cream and beginning and ending with the flour, beating just until blended and no lumps of flour remain. Slowly pour in the chocolate-cocoa mixture and beat until no white streaks are visible, stopping the mixer occasionally to scrape down the sides of the bowl. Using a rubber spatula, gently fold in the chocolate chips. I added the chocolate chips right into the mixer, skipping folding the chocolate chips with hand.

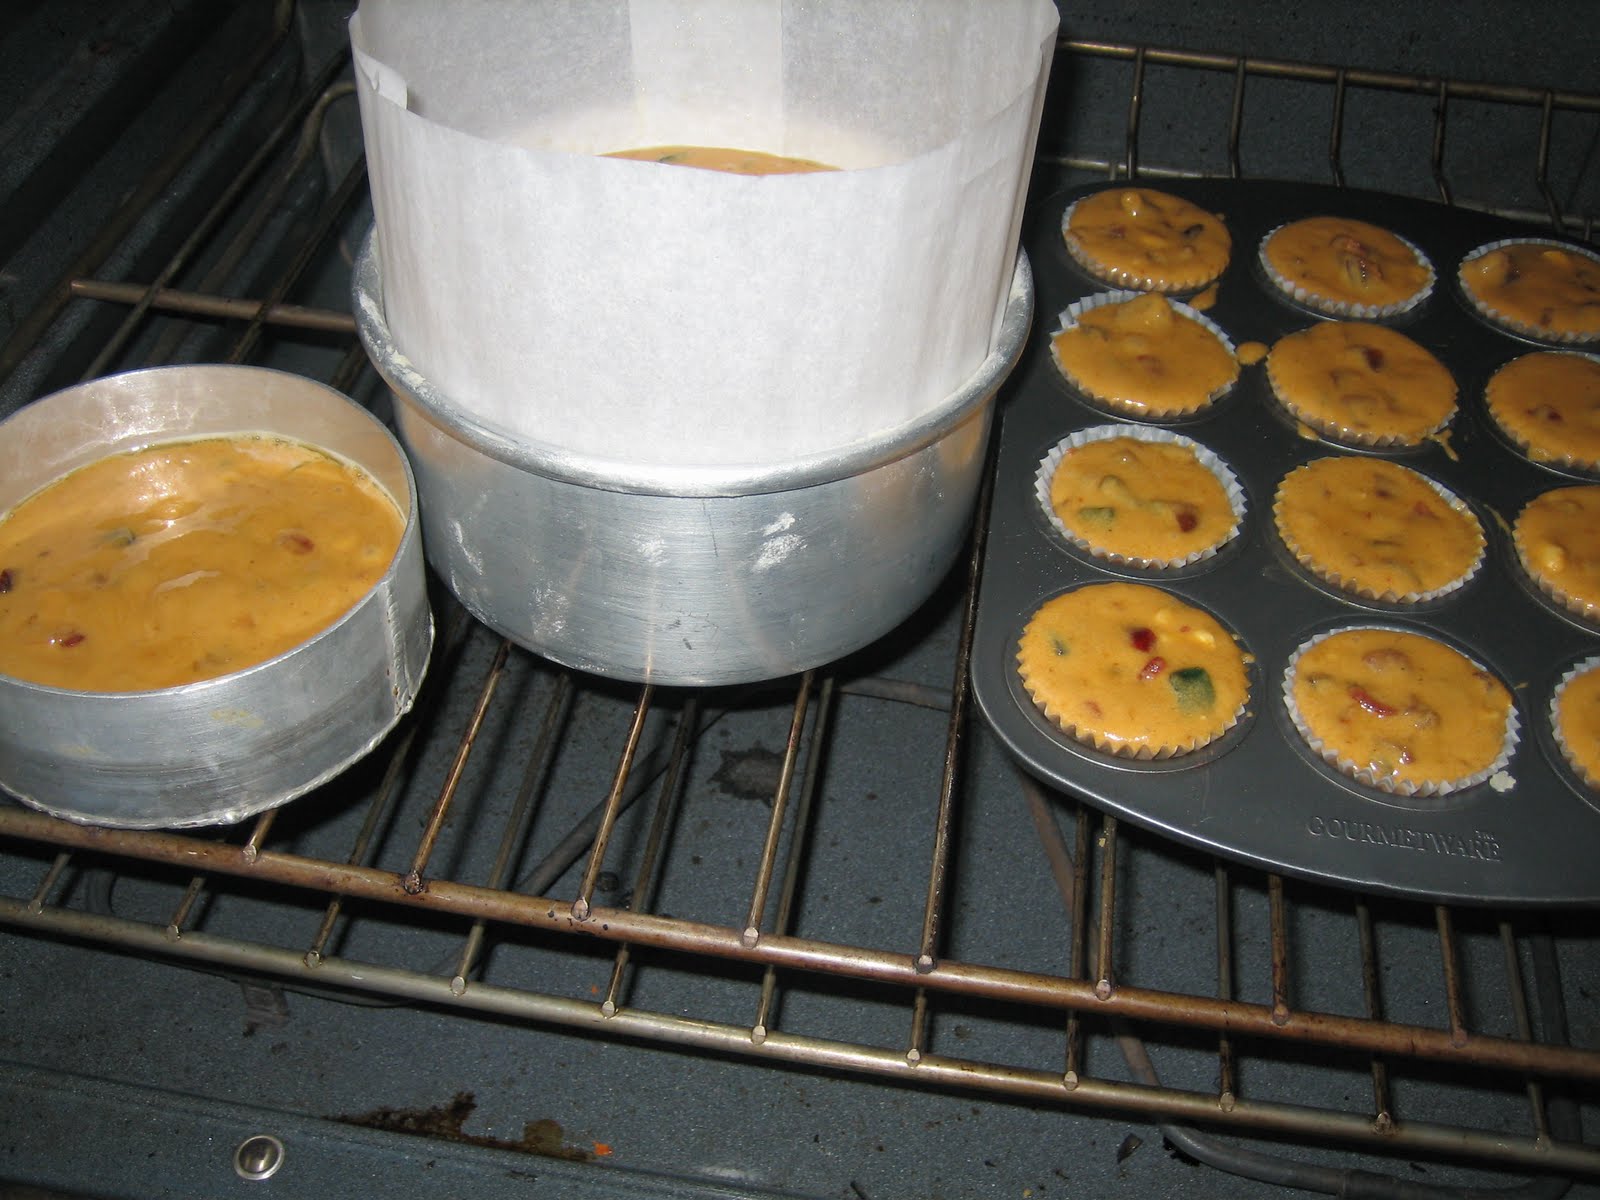
Pour the batter into the prepared pan. Bake until a toothpick inserted into the center of the cake comes out with only a few moist crumbs attached to it, 60 to 65 minutes. Transfer the pan to a wire rack and let the cake cool upright in the pan for 15 minutes. Invert the pan onto the rack and lift off the pan. Let the cake cool completely, at least 1 hour.

Return the cooled cake to the pan. Using a serrated knife, gently saw off any excess cake that extends over the edge of the pan. Set the wire rack on a parchment paper lines baking sheet. Invert the pan onto the rack and lift off the pan.

Meanwhile make the ganache:
 
 In a heatproof bowl, combine the chocolate and butter. In a small saucepan over medium-high heat, bring the cream just to a boil. Immediately pour the cream over the chocolate and butter. Whisk until they melt and the mixture is smooth.  First time around, I got a very diluted version of ganache and I made addition of 1 tbsp of chocolate chips at a time to thicken this. Second and the third time was a perfect ganache so I guess there is no way to fail with this ganache.

Pour the ganache over the top of the cake, allowing the ganache, to drip down the sides. Let the cake stand until the ganache is set, at least 15 minutes.
 As an addition, I topped my ganache with cake crumbs and chocolate chips.


Sunday, May 13, 2012

Angry birds cake, Marble cake with Swiss meringue frosting

   Fondant figures waiting to be assembled on the cake. See below for the finished cake.


The flavor for this cake is marble and the best recipe to get this from is Martha Stewart. She makes some pretty amazing ones. Her marble cake was the best choice as its one of the good ones out there. The only problem I encountered was quadrupling this recipe because hers makes one  9x5 loaf pan and I needed it for a 10" square. I doubled the recipe and got a batch of cupcakes along with the 10" square so be ready to have some extras for taste testing.

The icing is Swiss meringue, Martha's recipe again as this is the best recipe for  a smooth wedding cake look alike kind cakes. The icing is also good for making roses and intricate details as it can withstand some extra handling of the pastry bags without melting or altering the consistency unlike the butter cream.
 
 
 Decorations are made of fondant, all the little figures, catapult, little stones and the henge I did not bother making them from scratch as today was not the day for experiments and besides Wilton  and Duff  Goldman  both sells great fondant and are reasonably priced. So don't bother unless you actually plan on eating them. Mine was more for the deco, anyway.


 Here's how it all looked put together. It was a big hit, taste wise among the grown-ups and the 12 yr olds loved demolishing the cake to death. That was whole purpose of making this cake. What did you think...the kids looked forward to eating it? No Siree! They couldn't wait to pick the little figures off the cake and trying some free throws before popping them into their mouth.  "Cool looking cake" is all I heard from the party hostess at the bowling alley and the kids and most importantly the birthday boy!


I have doubled the recipe that yields one 10" square and about 8 cupcakes. Bake for 1 hr and 15 minutes for cake and 18 to 15 minutes for cupcakes.

Yield Makes one 9x 5 loaf cake

Ingredients
 
1/2 cup (1 stick) unsalted butter, room temperature, plus more for pan
1 3/4 cups cake flour (not self-rising)
2 teaspoons baking powder
1/2 teaspoon salt
1 cup sugar
3 large eggs, room temperature
1 teaspoon pure vanilla extract
2/3 cup buttermilk, room temperature
1/4 cup plus 1 tablespoon Dutch-process cocoa powder

Directions

  1. Preheat oven to 350 degrees. Generously butter a 9-by-5-inch loaf pan; set aside. Whisk together the cake flour, baking powder, and salt; set aside.
  2. In the bowl of an electric mixer fitted with the paddle attachment, beat the butter and sugar until light and fluffy, about 5 minutes. Add eggs, one at a time, beating until combined after each addition and scraping down the sides of the bowl as needed. Mix in vanilla. Add flour mixture in 2 batches, alternating with the buttermilk and beginning and ending with the flour. Set aside 1/3 of the batter.
  3. In a bowl, mix cocoa and 1/4 cup plus 2 tablespoons boiling water with a rubber spatula until smooth. Add the cocoa mixture to the reserved cake batter; stir until well combined.
  4. Spoon batters into the prepared pan in 2 layers, alternating spoonfuls of vanilla and chocolate to simulate a checkerboard. To create marbling, run a table knife (or wooden skewer) through the batters in a swirling motion. I skipped marbling but instead put a couple tablespoons of chocolate batter in random places.
  5. Bake, rotating the pan halfway through, until a cake tester comes out clean, 40 to 50 minutes. Transfer pan to a rack to cool 10 minutes. Turn out cake from pan and cool completely on the rack. Cake can be kept in an airtight container at room temperature up to 3 days


A look on the inside!


Swiss Meringue buttercream

Ingredients
 
2 1/2 cups sugar
10 large egg whites
4 cups (8 sticks or 2 pounds) unsalted butter, cut into pieces
2 teaspoons pure vanilla extract
 
Directions
  1. Place sugar and egg whites in the heat-proof bowl of an electric mixer. Set bowl over a pan of gently simmering water, and whisk until sugar has dissolved and egg whites are hot to the touch, about 3 minutes. Test by rubbing the mixture between your fingers; it should feel completely smooth.
  2. Transfer bowl to mixer stand. Using the whisk attachment, beat on high speed until mixture has cooled completely and formed stiff and glossy peaks, about 10 minutes.
  3. Add the butter, one piece at a time, and beat until incorporated after each addition. Don't worry if the buttercream appears curdled after all the butter has been added; it will become smooth again with continued beating. Add vanilla, and beat just until combined.
  4. Switch to the paddle attachment, and beat on the lowest speed to eliminate any air pockets, about 5 minutes. If using buttercream within several hours, cover bowl with plastic wrap, and set aside at room temperature in a cool environment. Or transfer to an airtight container, and store in the refrigerator, up to 3 days. Before using, bring buttercream to room temperature, and beat on the lowest speed with the paddle attachment until smooth, about 5 minutes. This is one step that is crucial  is to beat the chilled buttercream to room temperate for the smooth finish on cakes.
 

Friday, February 17, 2012

Tiramisu

 Among zillions of tiramisy recipes in the blogsphere, here's my 'go to' tiramisu recipe if I'm pressed for time is to make do with store brought lady fingers (gasp!), comes together in less than hour minus the 24 hr chilling period. A perfect  no fail recipe is always a favourite on in my list.  I would proudly serve this version of a  tiramisu to any Italian...thats how perfect these are!


Tiramisu
Serves 8
Note: For the best results, make this 24 hours in advance of serving

1 cup heavy cream
4 large egg yolks
1 tablespoon dark rum, Amaretto, Kahlua, or Godiva liqueur (I used dark rum)

1/3 cup superfine sugar
1 2/3 cups mascarpone, soften at room temperature for 1 hour
1 batch lady finger cookies from here or 3 packages (31/2-ounce kind) lady finger cookies
3 cups very strong, cold coffee
1 tbsp Cocoa powder, for dusting
1 tbsp instant coffee powder, for dusting

In a large, cold bowl, whip the cream to stiff peaks. Refrigerate until ready to assemble the tiramisu.

In the bowl of an electric standing mixer, combine the egg yolks, rum and sugar. Beat the mixture at a high speed for 2 minutes. It should be quite thick and leave a trail when the beater is lifted away. Place the softened mascarpone in a large (seperate) mixing bowl, and gently fold in the beaten egg-and-sugar mixture.Now, fold in the chilled whipped cream. Cream is now ready for layering.

Dip each ladyfinger briefly into the coffee, and arrange in rows on the bottom of a cake pan 'the kind that had easy release lever on the sides used for cheese cakes. Line the sides and bottom with parchment paper. Any bakeware dish works as well (preferably 8" but I used 6-inch round in my case and ended up with leftover so I had to make 3 individual cups as well) or pyrex baking dish. Gently spread an even layer of the mascarpone/cream mixture over the ladyfingers, and top with a second layer of coffee-dipped ladyfingers. Spread with the mascarpone mixture. You can make a  third layer of ladyfingers, and end with a layer of the mascarpone but the taller the tiramisu, more temperamental it gets. So newbies stick to double layers.

 Cover the pan tightly with plastic wrap, and refrigerate for no less than 24 hours, and up to 36 hours. Dust generously with cocao and coffee powder and  cut into 6 wedges for serving (having kept aside  3 of them made into cups, I got one extra serving for taste testing).

Optional, a dollop of whipped cream, chocolate wafers or sticks and a  strawberry.


Recipe # 2  from 'taste of home' magazine for icecream lovers
Tiramisu icecream dessert

Ingredients:
•¼ cup chilled whipping cream
•1 tsp confectioners’ sugar, sifted
•About 2/3 cup good quality coffee ice cream
•About 2/3 cup good quality vanilla bean ice cream
•4 savoiardi (Italian crisp ladyfingers), each broken into quarters
•½ cup freshly brewed espresso
•A small piece of bittersweet chocolate.
Preparation:
Whip the cream with sugar until it just holds medium-stiff peaks. Set aside for a moment. Divide the coffee ice cream between the glasses, top with the vanilla ice cream, then put the ladyfingers over the ice cream. Pour the hot espresso on top and dollop with the whipped cream. Grate some chocolate over the cream. Serve immediately.

Saturday, January 8, 2011

Lady fingers/ Savoiardi

The  couple days of break from school for kids, the cabin fever & us snowed in from the blizzard has been good for me baking wise. I finally got to crossing off more from my 'to-do's' as well as making savoiardi. And why not, it takes only basic ingredients + it is fun to pipe them in neat rows & the kids love to sprinkle sugar & watch them dissappear. I now wonder why I waited so long to make these delicate fingers.

In the past, I have spent a lot of time at the bread isle & the bakery section looking for lady fingers at every trip at the grocery. If I did get my hands on them, they looked very flat & underbaked. Making them sounded  much simpler than going in search of these.

I followed the trustworthy The Cordon Bleu At Home . 
Makes about 36 fingers


Ingredients:
Eggs, 3 separated
Granulated Sugar, 6 tbs
Cake Flour, sifted, 3/4 c
Confectioner's Sugar, 6 tbs

Method:
Preheat the oven to 350 degrees, then brush 2 baking sheets with softened butter and line with parchment paper.

Beat the egg whites with a whisk or electric mixer until stiff peaks form. Gradually beat in the granulated sugar and continue beating until stiff peaks form again; the meringue will be glossy and smooth..
Lightly beat the egg yolks till you see ribbons like above. Gently fold into the meringue with a wooden spoon.  Don't overfold or the batter will deflate and lose volume resulting in ladyfingers which are flat and not spongy.
Sift the flour over the mixture and fold in gently.

Pipe the ladyfingers: Fit the pastry bag with the large plain tip and fill with the ladyfinger batter.
 Pipe strips of batter 5 in. long and 3/4 in. wide diagonally onto the baking sheets, leaving 1 to 2 in. between each strip.


 Sprinkle half the confectioner's sugar over the ladyfingers; wait 5 minutes and sprinkle with the remaining sugar. Sprinkle half the confectioner's sugar over the ladyfingers and wait for 5 minutes. The sugar will pearl or look wet and glisten. Now sprinkle the remaining sugar. This helps to give the ladyfingers their characteristic crispness.
 Holding the parchment paper in place with your thumb, lift one side of the baking sheet and gently tap it on the work surface to remove excess confectioner's sugar. I skipped this step so as to not disturb my perfect looking biscuits; besides they didn't effect my final product.


Bake  for 10 min (without opening the oven door). Then, rotate the baking sheet so the ladyfingers color evenly, bake another 5 minutes.

Remove the ladyfingers from the baking sheet with a metal spatula while still hot, and let cool on a rack.

Sunday, December 26, 2010

Christmas cake/ Plum cake

 Here's our gingerbred house for this year!

Christmas cheer follows w-a-y after the holiday. A whole month of baking, making experimental goodies & being in the spirit all of that doesn't end yet, for this baking lunatic.
I have a couple more days of celebration still in store for my kids including a second gingerbread house ( first one was from a pre-made cookies, that doesn't count so Im getting my over-acheiver wind in me in attempting a house from scratch)

This week has lots in store for us. M also is trying his hand at a few more kinds of cookies to bake before the year ends since his whoopie pies were a big hit among his friends. With the vacation week, we can never have too many things to do at home since  mommy's 15  free minutes  or freedom/lazing on the sofa = reruns of "what do we do, now?" by my very easily bored kids.

 The snowstorm past weekend was a blessing in disguise for me, for a change being snowed in was a break from the usual grocery trip, the library, chauffeuring the kids to play dates & such. On the con's side though: the DVD's have been overused, board games are overused & ripping of the sides & I'm noticing that my family is constantly hungry. Is it because it's cookie season?

Let me hold on to the beauty of winter, the shimmering  tree  lit till the month end at the very least & my oven will be used once everyday till we run out of sugar or flour.  I still have 2 more friends who  missed  my cake this season. Today is a perfect day to bake up another batch of Christmas cake just for the pic purpose. This time a sheet cake, a muffin tray and a small 6" pan will be a perfect size to share.

(My round cake went to the Uttagi's party) here's a pic of the cake squares saved to share with the neighbour & for my V.

Ingredients
Candied citrus peels, raisins, marashino cherries, dried cherries, cranberries, currants, raisins, dates - make 3 cups(any combo)
rum – 1 cup
All purpose flour – 3 cups
Baking powder – 1 tsp
Butter – 2 sticks
brown Sugar – 2 cups
Granulated Sugar – 1/2 cup
Eggs – 6
cashew nuts, walnuts, raisins - about 10 each
All-spice powder - 1 tsp
cinnamon powder- 1/2 tsp
Salt – 1 tsp
Vanilla essence – 2 tsp

Method:

Prep the cake pans: butter the pans,


dust the pan with flour,

then line a sheet of parchment paper around the circumference ( I didn't know how many inches of extra height so I made 6" over the rim...what was I thinking?) & the bottom of the pan( here's where I messed up, I didn't line the bottom since my cakes 'always comes out clean; but- not this
time around :(


 Note to self: Make time for this extra (worthy)step. Line the bottom of the pans!!!

Soak up the fruits with rum, cover & set aside in a dark cabinet for 3 days to up to a month in advance.( I soaked up mine a day before thanks givimg weekend to get all the babies drunk up so
4 weeks = pretty drunk up fruits...oh-la-la)


 .


Sift the dry ingredients: flour, baking soda, all-spice powder, cinnamon powder, salt. Add cashew nuts cranberries, dried dated, dried cherries to this.


Cream the butter with brown sugar till the sugar crystals have almost dissolved. Add eggs &vanilla extract. Whisk till blended.


 .


Caramelize the sugar, by heating 1/2 a cup of sugar in the saucepan with 1 tbsp of water on a medium high heat, without stirring. The purpose is to achieve a deep brown syrup. This will take about 10 mins.


.

Remove from heat, set aside for a couple mins & then add 1/2 a cup of water. Don't be afraid of the sizzle.


beat together: soaked fruits, dry ingredients, caramel syrup, creamed butter-sugar mixture.

bake: pour this into cake pans


& bake at 300F for 2hrs for round pan, 1 hr for th sheet pan, 35 mins for mini muffins. This recipe yields 6x 4" round + 9"X13" rectangle pan (my first batch) OR 6x4', 12 mini muffins & a 2" round( 2nd batch).


Cool on pan for 15 mins. Invert on a cooling grid, remove the parchment paper. Cool completely.

Typically this cake is made a week in advance, every other day sprinkled with a couple teaspoons of brandy or rum and stored in an airtight container untill the christmas eve. Mine was presoaked dry fruits. I skipped this on purpose. End result was all worth the circus.

Monday, November 1, 2010

Rainbows & sunshine cake

This fun and festive piece of edible art is just what I was itching to make. I had the perfect occasion, my best friend's son's( R's 4th b'day) party;  the upcoming event to bake for. Thank heavens for such occasions that keeps my dreams alive!
 The little curly haired pumpkin just wanted his friends for a play date on his birthday. Gotta love this kid! Of all the things he could wish for, the day where every parents can get him what his heart desires,he chose friends. Such a cutie!

 My cake making dreams sort of overlapped over each other; making it difficult to chose one kind. What would make him happy? Most kids only care about the outside. I wanted it pretty both in & out. I was
determined with a rainbow  cake & was all set to make a special cake . A cake that would show sunshine in his eyes & a big smile as it was revealed.  Which kid doesnt like bright colors? If he is anything like my kid, he would love all the crayons to make a small design & considering the simalarities of taste between a 4 yr old & 5 yr old. It was easy to decide.
  My friend loved the cake the moment she saw it.and sure enough, little R was excited too. That's what makes this worthwhile..the real sunshine in his smile. Happy birthday, Rishab! Hope you had a terrific party!


The little crowd loved it just as much as I loved making it. the cake had a serious lean..pretty obvious! I didn't know if the cookies were keeping the cake upright or the cakes were keeping the cookies. Either way, I just wanted it to stay tall till the big moment.
The cake was a big sucess & the kids couldn't keep their hands off the buildings, which was a HUGE compliment in itself!
I mapped out a plan, got the supplies and was all set to bake this with my helpers.
here's a peak of the inside of the ginormous cake.


Ingredients:
2 boxes, Pillsbury ( white cake, with the pudding in the mix) cake mix + all the ingredients required to make the cake according to instructions ( such as oil, eggs, water). Aluminium tin foil cake pans, 6, 9'x 2', Wilton gel colors.


Divide the batter into 6, color using the gel colors , pour into the greased ( fail proof method: use Pam spray to mist lightly all over the inside, sprinkle 1 tbsp all purpose flour, coat by shaking  the pan so the flour adheres to the grease, tap off the excess) tin foil cake pans & bake for 18-22 mins at 325F. Cool for 15 mins in the pan. Remove & cool on the wire racks till completely cooled.


Pipe a thin ring of icing a quarter inches away from the sides to hold all the icing in. Generously frost the layer of the cake.


Frost a thin layer of soft butter cream, also called as crumb coat( holds all the crumbs in the icing)and chill for about an hour. The cake is now ready to be frosted and decorated away!


For the cookies, I used 1 package of Sugar cookies, 1 batch of Wilton's Royal icing ( recipe follows) & Wilton colors.
Cookie dough was rolled out to 1/2" thickness. Cut as desired and bake till the edges begins to brown. Mine took exact 9 mins.

Cool completely on a wire rack & decorate.
(G's note: This cookie was slightly on the soft side as we normally would want for the sugar cookie to be...but, I would like to add a couple tbsp of all purpose flour to this next time if I'd make tall buildings, so it would hold its shape through the party.)

.
Royal icing for the cookies:
4 cups confectioners sugar
3 tbsp meringue powder
6-7 tbs warm water
beat all the ingredients together for 7-8 min.
G's note: Double wash all the materials( mixing bowl, beater blades, piping tips, spatula) that may come in contact with royal icing since teeny tiniest traces of grease will break down this icing and once it does that,it cannot be revived.

Monday, October 25, 2010

Anniversary cake


I challenged myself last week to see just how good of a decorator I could be & excitedly agreed to bake a cake for my sis's anniversary
(her idea, a simple cake for a few goodfriends ..pufft...simple cakes are found at grocery stores, my cake had to be the kind we find in the magazine... something to get a 'WOW' out of her).

The prep work, the baking, the decorating to the debut of my latest cake was a huge success & the best part was that couple absolutely adored the cake. That makes the sleepless nights all the more worthwhile. Although I had the cake secure enough to travel down 3 hrs so it wouldn’t move, the mental image of my cake shimmering like jello all the way to the 'big apple' consumed my thoughts. My 3 hrs were consumed by mentally sketching & erasing the imaginary masterpiece shatter. Lucky for me, all that I imagine doesnt turn out true!

Among the compliments came all the queries on the process of getting this done.I sheepishly had to reveal it wasn't that big a deal & the cake baking was super easy as well as the decorating, especially since i use the 'box mix' cakes to craft my decoration. Because I trust my box mix wholeheartedly, I can confidently offer to make a party perfect display, If I may say so myself! Check it out!

The cake recipe was 4 boxes of white cake mix for a 10', 8' & a 6'cake. I'm a total cheat to use a premade/ measured box, but that’s A-OK. With this type of cake, where there are other details and things to take care of, I think it’s perfectly fine to cheat.

Friday, March 26, 2010

5 min choc cake


Ingredients:
4 tbsp all purpose flour
3 tbsp choc chips (any kind)
1 tsp vanilla
4 tbsp sugar
2 tbsp cocoa powder
i pinch salt
1 egg
5 tbsp milk
3 tbsp oil

Mix all the ingredients together in a coffee mug. Microwaave on high for 3 mins. Cool for a minute. Sare and enjoy!

Saturday, February 13, 2010

Vanilla cake with choc frosting

Mix together cake flour, water, eggs and oil to a smooth batter.


Spray the pan with cooking spray or smear with butter generously. Bake at 325F for 1 hr for a 8 inch diameter by 3 inch height. ( 8 X 3)


Remove from oven. A well done cake should leave the sides of the pan.


Remove after 10 mins, while it is still warm to ensure the easy release of the cake.


Cool on a cooling rack till completely cooled.


Smear some icing on the base of your cake board so that the cake won't slide during placing.


Make as many layers as desired. In my case, due a good height of cake pan, I got 4 layers out of 3".


Pipe a ring of icing so the filling does not ooze out, between each layers.


Ice the top of the cake first by using a lot of icing on top since it is easy to remove extra icing but hard to put it back on if your spatula touches the cake, making all the crumbs to ruin your cake.


Ice the sides next, again without letting the spatula touch the cake. At this point, the spatula should touch the icing only at all times, for the same reason explained above.


A comletely iced cake, also called crumb coating. The cake is visible and the crumbs may show through the icing...no worries, since this is getting a second coat of icing. Now the cake can be chilled for an hour to seal the crumbs. I skipped the step since I did not get crumbs on my first coat.


A second coat was applied(In my case chocolate) Decorated and was ready for presentation.


Here's a second look as I totally loved making this for my sweetie!


The irresistable chocolate rose. If I may say so, myself!