Showing posts with label cookies. Show all posts

Thursday, May 31, 2012

Smiley cookies

Photo enlarged!
  Cuteness Overload!  Where ever you see smileys it sure makes one smile. Aren't these the cutest little thing ever, created to bring smiles to the person receiving it? Be it with a card, at the end of a note or in an email. I just love smileys!!!

 
I figured these baby bites were the perfect treats for 7 year old cubs for their end of the year party at the scouts. Today we thank our Scout master for preparing  restless little boys into becoming responsible  citizens of tomorrow. I plan on sending these home as a favor with all that cubs that attend today as we ended up with way more that we should have in the house ;)

 
 Woot woot to my  little scout who is graduating from a tiger cub to wolf! 

 
I made a batch of  basic sugar cookie recipe  and the regular Wilton royal icing to make these.
  • 2 sticks cold butter, cut up
  • 1cup sugar
  • 1 tsp vanilla extract/ paste
  • 1 egg
  • 1 tsp baking powder
  • 3 cups all purpose flour
 
 
In a mixer bowl, cream together butter cubes and sugar

 
This time I remembered to use vanilla paste (TJ Maxx, 6$...what a steal!) before mixing in the dough. Beat all ingredients till the mixture is creamy. Scrape bowl all the way to the bottom (crucial).


Add in egg and beat just until mixed.


Add in flour and baking powder and mix. At this point, be kind to your mixer and knead the rest with hand. (Using mixer to get a completely smooth dough will result in tough textured cookies and we don't want that!) The dough comes together sooner than you can sing your ABC's :)


See! Make two flat discs out of it.


Refrigerate. I don't track time, but usually while the discs are chilling, I prepare parchment lined pans, set aside a couple plates for placing cookies in freezer and am clearing up my area for rolling out the dough. What I mean to say is that timing does not matter here.

 
 Oh, and I have the dough disks in a bowl instead of saran wrap because I want to be able to switch the discs in between work. Keep following the  pics, you will see!


Roll out the dough between two parchment sheets or in my case Silpat at the bottom and parchment on top. Silpat at the bottom helps by staying stuck to the counter and does not slide like the parchment sheet does. Always!

 
 My cookie cutter was the 'inside' of linzer torte. Cut away!


 here's my linzer torte cookie cutter to show you what I mean!


Remove all the cookies and place on a plate( you can freeze directly on the cookie sheet too but my freezer does not allow my 9x 13 sheet to sit flat). So I always have one extra step....not a biggie!

 
 Freeze for 5 to 10 minutes. In the mean time, ball up the scraps and switch with the disc from the refrigerator. This is where using the bowl instead of cling/saran wrap helps. I mean do you seriously have the time to mess with saran at this point?

 
BTW, always always freeze before baking . That is if you hate mis-shapened cookie ( seriously, it will spread like nobody's business). Go ahead and bake!


Cool completely.  I let it sit 30 minutes.


Outline with thick royal icing.


 Flood with thin consistency.


Pipe in the details with 1m tip. Enjoy!


Wednesday, April 6, 2011

strawberry jam sugar cookies

These are especially made for our 'girls night in' event for my favourite girls ( Reshma, Deepa, Vinaya, Divya)coming over tomorrow eve. The cookies are made from my simplest  sugar cookie recipe of all with the addition of a drop of strawberry jam in the middle. Making these were a breeze. note to remember is to chill the cut out cookies & then bake as they spread super easy. It was tasty nonetheless.

Monday, March 28, 2011

Key Lime Cookie


Cookies:
2 cups all purpose flour
3/4 cup unsalted butter, at room temperature
1 cup granulated sugar
zest of 2 key limes
2 egg yolks
1/4 tsp. vanilla extract
1 TBSP key lime juice
Pinch of salt

In a medium bowl combine the sugar and the lime zest. Using a stand mixer with the paddle attachment, on medium-high speed, cream together the butter and lime scented sugar until light and fluffy, about 3 minutes.
Add yolks one at a time, scraping down the mixer after each addition. Mix in vanilla and key lime juice and beat for another 30 seconds on medium-high speed.
Add salt and flour and mix on low speed until ingredients are fully incorporated.

Divide dough into four logs. Roll so that they are easy to slice. Wrap them in plastic or wax paper and place into fridge for 1 hour. You can go as long as overnight if you have stuff to do.

Preheat oven to 350F. Remove cookies from fridge. Slice cookies to about ½ inch thick. Place on a parchment lined (or you can use baking spray) cookie sheet and space about an inch apart. They don’t really spread out all that much.

Bake for 14-16 minutes depending on the size of your cookies. They aren’t going to be a super soft cookie. More of a shortbread bite if you will. Let them cool, drizzle  glaze.

 Glaze
2 cups powdered sugar
1/3 cup key lime juice
Zest of 1 lemon
Whisk the sugar and juice together until it’s a thick but pourable glaze. Pour over cookies. Let glaze set up, sprinkle (don't know what the right word is) zest and eat.

Saturday, January 8, 2011

Lady fingers/ Savoiardi

The  couple days of break from school for kids, the cabin fever & us snowed in from the blizzard has been good for me baking wise. I finally got to crossing off more from my 'to-do's' as well as making savoiardi. And why not, it takes only basic ingredients + it is fun to pipe them in neat rows & the kids love to sprinkle sugar & watch them dissappear. I now wonder why I waited so long to make these delicate fingers.

In the past, I have spent a lot of time at the bread isle & the bakery section looking for lady fingers at every trip at the grocery. If I did get my hands on them, they looked very flat & underbaked. Making them sounded  much simpler than going in search of these.

I followed the trustworthy The Cordon Bleu At Home . 
Makes about 36 fingers


Ingredients:
Eggs, 3 separated
Granulated Sugar, 6 tbs
Cake Flour, sifted, 3/4 c
Confectioner's Sugar, 6 tbs

Method:
Preheat the oven to 350 degrees, then brush 2 baking sheets with softened butter and line with parchment paper.

Beat the egg whites with a whisk or electric mixer until stiff peaks form. Gradually beat in the granulated sugar and continue beating until stiff peaks form again; the meringue will be glossy and smooth..
Lightly beat the egg yolks till you see ribbons like above. Gently fold into the meringue with a wooden spoon.  Don't overfold or the batter will deflate and lose volume resulting in ladyfingers which are flat and not spongy.
Sift the flour over the mixture and fold in gently.

Pipe the ladyfingers: Fit the pastry bag with the large plain tip and fill with the ladyfinger batter.
 Pipe strips of batter 5 in. long and 3/4 in. wide diagonally onto the baking sheets, leaving 1 to 2 in. between each strip.


 Sprinkle half the confectioner's sugar over the ladyfingers; wait 5 minutes and sprinkle with the remaining sugar. Sprinkle half the confectioner's sugar over the ladyfingers and wait for 5 minutes. The sugar will pearl or look wet and glisten. Now sprinkle the remaining sugar. This helps to give the ladyfingers their characteristic crispness.
 Holding the parchment paper in place with your thumb, lift one side of the baking sheet and gently tap it on the work surface to remove excess confectioner's sugar. I skipped this step so as to not disturb my perfect looking biscuits; besides they didn't effect my final product.


Bake  for 10 min (without opening the oven door). Then, rotate the baking sheet so the ladyfingers color evenly, bake another 5 minutes.

Remove the ladyfingers from the baking sheet with a metal spatula while still hot, and let cool on a rack.

Sunday, December 26, 2010

Nutella chocolate Cookies

I'm on a roll,  cookie baking fest is going full-on. Having a nutella-crazy little kid, experimenting anything with it or chocolate for that matter is easy. There's the inspiration right there!
These turned out so good that we decided to share it with Santa. How generous of us!


Ingredients:½ cup unsalted butter, at room temperature
½ cup granulated sugar
½ cup firmly packed light brown sugar
½ cup Nutella
1 egg
½ tsp. vanilla
1 ½ cups flour
1 tsp. baking soda
¼ tsp. salt
1/2 cup chopped chocolate bits (I used Giraldeli milk choc)

Preheat oven to 350F.

Cream butter and sugars in a mixer on high speed,  about 3 minutes, until light and fluffy.
Add the egg, vanilla, Nutella and mix well.
Add the flour, baking soda, and salt and mix on low speed until all the ingredients are incorporated. Increase the speed to medium and mix just until the dough is smooth. Fold in chocolate chips.
Bake 6-7 minutes. Let cookies cool about 5 minutes and transfer to a rack to cool completely.

Friday, December 24, 2010

Sugar cookies

 A little string of Christmas lights  hung over my kids bed push me to bake a few sugar cookies using these colors as an inspiration. More cookies= more sharing, less guilt  while sneaking in a few of these goodies. Here's a simplest of all recipe to make this baking season fly by. 
A day spent in making these cookies went faster than imagined because there were absolutely no mess to clean up afterwards. Here's why- I didnt sift the flour, didnt roll out  the dough on the kitchen counter & there was no pile of crumbs on the floor. That's a motivation in itself!

A pretty simple one bowl, one wooden spoon recipe. Love it!

1 cup sugar
1 cup butter, softened
1 teaspoon vanilla
1 egg
2 1/3 cups  all-purpose flour
1/2 teaspoon baking soda

Heat oven to 375°F.

Beat sugar and butter with spoon until light and fluffy. Stir in vanilla, and egg. Add in flour and baking soda in batches scraping dough from the sides & mixing evenly. Shape dough by teaspoonfuls into balls. Place about 2 inches apart on ungreased cookie sheet. Flatten with bottom of glass dipped in sugar.

OR

 For roll out cookies, add 2 tbsp extra flour. Divide into two flatened disk, cover with cling wrap. Refrigerate for 15 mins. Roll out between 2 sheets of wax or parchment paper to 1/4"thickness & cut circles.

Bake 9 to 11 minutes or until set. Remove from cookie sheet to wire rack.

 Serve as is, glazed or cover with royal icing. For the glaze, mix 2 tbsp confectioner's sugar & 1 tsp lime juice well. Drizzle over cookies & sprinkle with sanding sugar or citrus zests.

Saturday, December 18, 2010

Nan Khatai

The past week my thoughts were consumed with all the goodies that I'd bake for Christmas kuswar( goodies platter). The only friend who bakes this season in the spirit of Christmas is a a fellow foodie, Mamata Uttangi. Her house is always loaded with baked/fried goodies..all home-made and in massive quantities. When I say massive, I mean m-a-s-s-i-v-e. Her cup for measurement is a 'ser/sher aka pav'. You get the point!


Last week, nan khatai was the highlight of the eve. Upon offering these, I shamelessly forgot to offer my husband one, ignored my kids & relished them like they were the first time I had laid my hands on them. You don't understand...If you are a materialistic person, in your view, these are like gold to me, let's say "a melt in your mouth" kind of gold. They were the first home-made nan khatais that tasted authentic & far better than bakery ones, tantalizing my nostalgic memory...teasing for more.

Would nan khatai purists be terribly upset for doing this to plain old cookies? (BTW,the crushed pistachio goes in before being baked so it adheres well as well as hides unsightly cracks ( two-fer again!)...if you are a perfectionist like me & don't like to see your goodies  crack on top while baking)


Recipe source: Mamata Uttangi
pretty easy '5321' in her words. So here goes:
Half recipe yields 72 nan khatais.

Ingredients:
5 cups maida/ AP flour
3 cups sugar
2 cups ghee
1 cup besan
Elaichi powder

Mix all of the above. Place on counter top (covered) overnight.


The next day, shape into balls, flatten them. Place on parchment lined sheet pan, bake at 350F for 10-15 mins. I say 10 minutes for just done ivory colored nan khatai. For brown edges 15 mins.


Turn them to see slight browned bottom. Cool.


Seriously, that's it!

FYI, no extra lbs were put-on in the making of these.
All my goodies were shared with Sheila, Indu, the librarians at my town & Mamta of course!

G's note:
*Mamta rolled it into a log and cut up discs & baked (considering the amount she had to tackle that day with a toddler in tow).
*I made half of the recipe, had all the time on hands to shape these babies and went a step further like mentioned above.

Meringue cookies

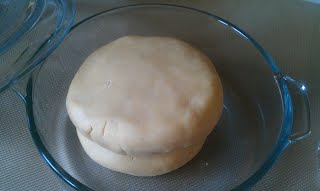
A novice conquers her fear and enters a unknown territory. It's about time! Anyone who worked with these knows what I'm talking about. You need to beat the egg whites, just right. A few beats shy and you don't get the peak that you were anticipating. A couple extra beats & you loose the peak/ fluff & shine and end up with curdle mess. Apart from these problems, the worst is the crack on the finished product (I had 2 hairline crack on my cookies, 2 out of 75, not bad, I say). A "baking experiment that yielded perfection" is a beautiful day!.


Meringue cookies a k a Cashew macaroon: who knew that a shapeless mound of snowy tower with bits of cashew nuts poking through, would change a mom's priorities for a day?! "Today is the changing day in your life", picture Dr Phil's voice as you read this. Overcoming fear of deflated macaroon/ meringue & moving on is crossed off of my list today!


You may think, why in the world, would I want this so bad!
The answer is
(1) I don't accept failure well,
(2)At a recent trip to homeland, a little friend presented my kids with a packet of meringue also called as cashew macaroon (not to be mistaken with coconut cookies called as macaroons as well) that they absolutely loved &
(3) lastly, I live in a land where such desi delicacies are rare and with any luck if I happen to find a packet, they are near-rotten.

I've finally overcome the fear of deflated dry meringues.
The keys to remember are:
do not open the oven impatiently while baking these cuties.
Use cream of tartar to stabilize the meringue
beat egg whites to soft peaks( at least) before you add sugar.
If adding nuts or choc chips, add it to the piped meringues not to the batter.

Pics didn't do justice, but is up for curious cats.


Thanks to Sandra Lee's recipe, we now have a perfect 'kisses'
Ingredients
3 egg whites, at room temperature
1/4 teaspoon cream of tartar
3/4 cup sugar
1 teaspoon imitation strawberry extract
3 drops red food coloring

Special Equipment: Pastry bag
#4 star tip
Directions
Preheat oven to 200 degrees F.


Line 2 heavy large baking sheets with parchment paper. Beat egg whites in clean large metal bowl on medium speed until foamy. Add cream of tartar. Increase speed to high and continue beating until soft peaks form. Gradually add sugar, 1 tablespoon at a time, beating until stiff peaks form, about 5 minutes. Quickly mix in strawberry extract. Stir in food coloring, 1 drop at a time, until desired color is achieved.


Spoon meringue into pastry bag fitted with star tip. Pipe 12 (1 1/2-inch high by 1 1/2 -inch in diameter) mounds onto each prepared baking sheet, spacing evenly apart. Bake for 3 hours, or until dry and crisp. Cool meringues completely on baking sheets. Store in an airtight container at room temperature.

Friday, December 17, 2010

Chocolate chip cookies

If you are looking for the chewiest moist cookies with chocolate in every bite & a crisp edges, this is the one for you. It will lead you to chocolate heaven & may also embarrass you with way too many praises from the ones who scarfed these bites of sinfully awesome goodies. So go ahead, make these for your kids but don't forget to save some for Santa!


Recipe courtesy: Alton Brown
2 sticks unsalted butter
2 1/4 cups bread flour
1 teaspoon kosher salt
1 teaspoon baking soda
1/4 cup sugar
1 1/4 cups brown sugar
1 egg
1 egg yolk
2 tablespoons milk
1 1/2 teaspoons vanilla extract
2 cups semisweet chocolate chips

1. Heat oven to 375 degrees F (I set mine at 350).

2. Melt the butter in a heavy-bottom medium saucepan over low heat.
Sift together the flour, salt, and baking soda and set aside.

3. Pour the melted butter in the mixer's work bowl. Add the sugar and brown sugar. Cream the butter and sugars on medium speed. Add the egg, yolk, 2 tablespoons milk and vanilla extract and mix until well combined. Slowly incorporate the flour mixture until thoroughly combined. Stir in the chocolate chips.

4. Chill the dough (about 1 hour), then scoop onto parchment-lined baking sheets, 6 cookies per sheet (mine were 18S disher ice cream scoop). Bake for 14 minutes (I baked for 12 mins) or until golden brown, checking the cookies after 5 minutes.(I skiped this step)
Rotate the baking sheet for even browning. Cool completely and store in an airtight container.

Tuesday, December 14, 2010

whoopie pie

A well known little pie that doesn't look anything like one; made of two soft chocolate cookies sandwiched with sweet creamy filling has been another favourite that my 10 yr  old loves to bake.

 The recipe  is not only super-easy to follow for my bake addict kid  &amp is  just as satisfying for this chocolate lover  but my best reason;  I don't have to bake a real cake & worry  about what to do with  about half the cake that sits in the refrigerator as a leftover. It is just the right size for a lumch dessert + freezes easy. You know how just how much I love a twofer idea!

Cookies:
2 cups All purpose flour
1/2 cup unsweetened cocoa
1stick (8 Tbs) unsalted butter, softened
1 cup sugar
1 cup buttermilk
1 tsp vanilla extract
1 egg
1tsp baking soda
1/2 tsp salt

Whisk together flour, baking soda & salt in a bowl until combined.
In a separate bowl, stir together buttermilk & vanilla.
With a mixer, beat together butter & sugar at medium speed untill mixture is plale & fluffy ( about 3 mins).
Add egg, beat till combined. Reduce speed to low & alternately mix in flour mixture and buttermilk in batches, scraping down the sides of the bowl after each addition. Mix until smooth.

Preheat oven to 350F. Line the sheet pan with parchment paper & spray with cooking spray.

Spoon 1 tbs mounds of batter. bake until tops are puffed & cookies spring back when touched, 8-10 mins. Mine took 14 mins as  the batter was slightly more than a tablespoon. Yeah, I don't spend time to measure each scoop. :0
 Transfer to a rack & cool completely.

Marshmallow filling:
1 stick ( 8tbs) unsalted butter, softened
1 1/4 cup powdered sugar
2 cup marsmallow cream ( fluff)
1 tsp vanilla extract

In a bowl, beat together butter, powdered sugar, marshmallow cream & vanilla to fluff it up.

Assemble the pies by spreading a teaspoon of filling on one  flat side of half of the cookies & top with the  other flat side. Repeat with the remaining.


Store: Refrigerated for a week, frozen upto 2 months. Serve at room temperature.

Sunday, September 26, 2010

Khara biscuits


One of a savoury cookies that is a big thing in bakeries all over Karnataka, (has got my taste buds yearning for one) is what I was dying to make & share with my friends. I finally got myself to put my thoughts in action and I'm glad that's striked off from my 'to bake' list. It was a super hit among my fellow desi's and It felt good getting appreciation for somethimg as simple as this. This one is a keeper.

Ingredients
1 cups Maida
1/2 cup butter
1 tsp salt
1 tsp sugar
1tsp baking powder
1 tsp yogurt
1/2 tsp turmeric
1/4 tsp jeera
2 green chillies, finely chopped
2 curry leaves,chopped

Method:
Sieve dry ingredients together(sugar, maida, salt and baking powder).
Add the softened butter, yogurt, chillies, curry leaves. Knead this to make a dough that binds together. Mixture of dough pressed together in a fist should hold the shape and not fall off to bits. Knead well, keep aside covered in a damp cloth for 30 mins.

Pre-heat the oven to 350 F. Line the cookie sheet with parchment paper.
Take half of the dough and roll like a chapathi until it is 1/4" thick.

Using an empty can as a cookie cutter, cut into circles. Place it on the cookie sheet about a inch apart.Prick the top of the cookies with the fork so that the cookies does not puff up during baking. brush the top with oil. Repeat to use up all the dough.


Bake for 20 minutes or until the edges browns to a golden color.

Friday, January 29, 2010

Sugar cookies


Ingredients
5 cups all-purpose flour
2 cups sugar
4 eggs
1 1/2 cups butter, softened
1 tsp vanilla extract
2 tsp salt

Method:
In a large bowl, cream together butter and sugar until smooth. Beat in eggs and vanilla. Stir in the flour, baking powder, and salt. Cover, and chill dough for at least one hour.
Preheat oven to 375 degrees F.
Roll out dough on floured surface or in between two sheets of parchment paper, about 1/4 to 1/2 inch thick. Cut into shapes with any cookie cutter. Place cookies 1 inch apart on parchment lined cookie sheets. Do not grease or flour the sheet.
Bake for 6-8 mins (the edges will turn slightly brown). The cookies at this point will look under done but it is completely cooked. Remove the baking tray and let cool( if not cooled, the cookie will crumble during removing from the sheet) 2 mins on the counter top, remove cookies with a statula and lay them on wire rack to cool.

Note: this dough can be made and shaped into a log, covered with parchment paper, saran wrapped and stored in ref/ freezer for later use. If frozen, thaw it for 1 hr before slicing.Refrigerated and sliced cookies can go right in the oven with the addition of 2 mins during baking time.