Friday, June 1, 2012

Asiago and Romano cheese rolls


M's favourite over the past year has been the new addition of cheese. A boy who loved to snack on string cheese and grilled cheese (mainly made of mozzarella) all these years has made an upgrade to Asiago cheese.  It opened up a whole another world for him!
 He loves  Asiago cheese bagels, tortilla toasted with Asiago, Quesadilla with Asiago, pizza bites topped with Asiago. Can one get serious medical condition from excessive Asiago binge? 

Here are his fav rolls  which he loves to eat hot off the oven with cold butter. Recipe is similar to laadi paav with the exception of placing the rolls with a little extra space so it spreads during 2nd proofing (2nd rise). Cheese lovers rejoice!

 In my 'To bake' list,  Parmesan knots from the Gourmet magazine is next.

2 cups warm water (110 to 115 degrees)
2 tbsp yeast
1 tsp sugar
2 1/2 tsp salt
2 eggs, beaten
1/2 cup Asiago cheese
1/2 cup Romano cheese
1 stick butter, cold, roughly chopped
5-5 1/2 cups AP Flour

Proof the yeast with warm water and sugar for 15 minutes in a mixer bowl.

Mix in eggs and rest (except the cheese) of the ingredients and mix on high for 5 minutes until the dough becomes slightly stiff and stretchy.  You can knead the cheese by hand if you are worried to ruin the shredded cheese texture. Add in cheeses and mix one last time. Scrape the bowl to make sure the bottom does not sticky. Cover the bowl with a wet kitchen towel and let the dough rise until doubled in size.

Punch the dough to deflate air and divide into 3 balls and further dividing each ball into 10 . This helps get even sized rolls. Place thirty rolls on a cookie (baker's half sheet pan)sheet (5 rolls by 6 rolls). Place the sheet pan in the oven to rise (No, we are not baking yet so don't turn the oven on).


  Let them rise on a cookie sheet until the rolls begin to touch each other filling all gaps. About 1 hour.

 Bake at 350 degrees on the middle rack for 25-30 minutes. Lightly butter the tops (cold butter from the fridge makes this part easy) after roll are out of the oven.

Thursday, May 31, 2012

lunch thali

Rice, Masoori saar-upkari, bhenda talasani, cauliflower bhajo


Sent from my HTC Inspire™ 4G on AT&T

Smiley cookies

Photo enlarged!
  Cuteness Overload!  Where ever you see smileys it sure makes one smile. Aren't these the cutest little thing ever, created to bring smiles to the person receiving it? Be it with a card, at the end of a note or in an email. I just love smileys!!!

 
I figured these baby bites were the perfect treats for 7 year old cubs for their end of the year party at the scouts. Today we thank our Scout master for preparing  restless little boys into becoming responsible  citizens of tomorrow. I plan on sending these home as a favor with all that cubs that attend today as we ended up with way more that we should have in the house ;)

 
 Woot woot to my  little scout who is graduating from a tiger cub to wolf! 

 
I made a batch of  basic sugar cookie recipe  and the regular Wilton royal icing to make these.
  • 2 sticks cold butter, cut up
  • 1cup sugar
  • 1 tsp vanilla extract/ paste
  • 1 egg
  • 1 tsp baking powder
  • 3 cups all purpose flour
 
 
In a mixer bowl, cream together butter cubes and sugar

 
This time I remembered to use vanilla paste (TJ Maxx, 6$...what a steal!) before mixing in the dough. Beat all ingredients till the mixture is creamy. Scrape bowl all the way to the bottom (crucial).


Add in egg and beat just until mixed.


Add in flour and baking powder and mix. At this point, be kind to your mixer and knead the rest with hand. (Using mixer to get a completely smooth dough will result in tough textured cookies and we don't want that!) The dough comes together sooner than you can sing your ABC's :)


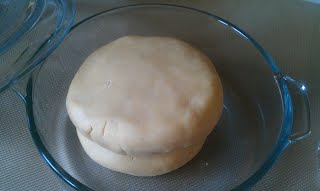
See! Make two flat discs out of it.


Refrigerate. I don't track time, but usually while the discs are chilling, I prepare parchment lined pans, set aside a couple plates for placing cookies in freezer and am clearing up my area for rolling out the dough. What I mean to say is that timing does not matter here.

 
 Oh, and I have the dough disks in a bowl instead of saran wrap because I want to be able to switch the discs in between work. Keep following the  pics, you will see!


Roll out the dough between two parchment sheets or in my case Silpat at the bottom and parchment on top. Silpat at the bottom helps by staying stuck to the counter and does not slide like the parchment sheet does. Always!

 
 My cookie cutter was the 'inside' of linzer torte. Cut away!


 here's my linzer torte cookie cutter to show you what I mean!


Remove all the cookies and place on a plate( you can freeze directly on the cookie sheet too but my freezer does not allow my 9x 13 sheet to sit flat). So I always have one extra step....not a biggie!

 
 Freeze for 5 to 10 minutes. In the mean time, ball up the scraps and switch with the disc from the refrigerator. This is where using the bowl instead of cling/saran wrap helps. I mean do you seriously have the time to mess with saran at this point?

 
BTW, always always freeze before baking . That is if you hate mis-shapened cookie ( seriously, it will spread like nobody's business). Go ahead and bake!


Cool completely.  I let it sit 30 minutes.


Outline with thick royal icing.


 Flood with thin consistency.


Pipe in the details with 1m tip. Enjoy!


Vedakki mor thalippu/ bendekai majjige huli


Lady fingers -1lb
Curd/yogurt - 2 cups
Onions -2, thinly sliced
Red chillies -2
Green chillies -4, slit
Turmeric powder - 1/2 tsp
Mustard seeds -1/2 tsp
Fenugreek seeds -1/2 tsp, coarsely crushed
Methi seeds -1/4 tsp
Curry leaves - 2 sprigs
Coconut oil- 1tbsp
 Vegetable oil - 1 tbsp
Salt to taste

Cut lady fingers in 1" pieces. Whip curd with turmeric and salt, keep aside.

Heat vegetable oil and season with mustard seeds, methi seeds, red chillies, green chillies, onion and curry leaves. Saute till translucent and a slight change in color. Add in lady fingers and saute well. Add in whipped curd and cook till oil separates from the gravy. Take of heat and add in coconut oil.


Sent from my HTC Inspire™ 4G on AT&T

Sunday, May 27, 2012

Egg masala


  • 4 eggs, soft boiled (7 minutes), each made into chunks (in my case 8 pieces)
  •  
  • Red onions - 3, finely chopped
  • Tomato - 4, finely chopped
  • Jeera - 1/2 tsp, coarsely crushed
  • Haldi -1tsp
  • Chili powder - 1 tsp
  • Green chillies - 5 slit
  • Oil - 1 tbsp
  • Kasuri methi - 1 tbsp
  • Coriander leaves
  • Salt to taste
  •  
  • Heat oil and add in jeera and green chillies. Add in onions and saute. When the onions are caramelised add in tomatoes, haldi, chili powder and salt. Cook for few minutes turning every now and then to prevent burning. Add a cup of water and simmer for 10 minutes. At this point it is back to semi dry gravy. Toss in chopped egg pieces and mix gently. Garnish with coriander leaves and kasuri methi. Yum!

 
Sent from my HTC Inspire™ 4G on AT&T


Sunday, May 13, 2012

Angry birds cake, Marble cake with Swiss meringue frosting

   Fondant figures waiting to be assembled on the cake. See below for the finished cake.


The flavor for this cake is marble and the best recipe to get this from is Martha Stewart. She makes some pretty amazing ones. Her marble cake was the best choice as its one of the good ones out there. The only problem I encountered was quadrupling this recipe because hers makes one  9x5 loaf pan and I needed it for a 10" square. I doubled the recipe and got a batch of cupcakes along with the 10" square so be ready to have some extras for taste testing.

The icing is Swiss meringue, Martha's recipe again as this is the best recipe for  a smooth wedding cake look alike kind cakes. The icing is also good for making roses and intricate details as it can withstand some extra handling of the pastry bags without melting or altering the consistency unlike the butter cream.
 
 
 Decorations are made of fondant, all the little figures, catapult, little stones and the henge I did not bother making them from scratch as today was not the day for experiments and besides Wilton  and Duff  Goldman  both sells great fondant and are reasonably priced. So don't bother unless you actually plan on eating them. Mine was more for the deco, anyway.


 Here's how it all looked put together. It was a big hit, taste wise among the grown-ups and the 12 yr olds loved demolishing the cake to death. That was whole purpose of making this cake. What did you think...the kids looked forward to eating it? No Siree! They couldn't wait to pick the little figures off the cake and trying some free throws before popping them into their mouth.  "Cool looking cake" is all I heard from the party hostess at the bowling alley and the kids and most importantly the birthday boy!


I have doubled the recipe that yields one 10" square and about 8 cupcakes. Bake for 1 hr and 15 minutes for cake and 18 to 15 minutes for cupcakes.

Yield Makes one 9x 5 loaf cake

Ingredients
 
1/2 cup (1 stick) unsalted butter, room temperature, plus more for pan
1 3/4 cups cake flour (not self-rising)
2 teaspoons baking powder
1/2 teaspoon salt
1 cup sugar
3 large eggs, room temperature
1 teaspoon pure vanilla extract
2/3 cup buttermilk, room temperature
1/4 cup plus 1 tablespoon Dutch-process cocoa powder

Directions

  1. Preheat oven to 350 degrees. Generously butter a 9-by-5-inch loaf pan; set aside. Whisk together the cake flour, baking powder, and salt; set aside.
  2. In the bowl of an electric mixer fitted with the paddle attachment, beat the butter and sugar until light and fluffy, about 5 minutes. Add eggs, one at a time, beating until combined after each addition and scraping down the sides of the bowl as needed. Mix in vanilla. Add flour mixture in 2 batches, alternating with the buttermilk and beginning and ending with the flour. Set aside 1/3 of the batter.
  3. In a bowl, mix cocoa and 1/4 cup plus 2 tablespoons boiling water with a rubber spatula until smooth. Add the cocoa mixture to the reserved cake batter; stir until well combined.
  4. Spoon batters into the prepared pan in 2 layers, alternating spoonfuls of vanilla and chocolate to simulate a checkerboard. To create marbling, run a table knife (or wooden skewer) through the batters in a swirling motion. I skipped marbling but instead put a couple tablespoons of chocolate batter in random places.
  5. Bake, rotating the pan halfway through, until a cake tester comes out clean, 40 to 50 minutes. Transfer pan to a rack to cool 10 minutes. Turn out cake from pan and cool completely on the rack. Cake can be kept in an airtight container at room temperature up to 3 days


A look on the inside!


Swiss Meringue buttercream

Ingredients
 
2 1/2 cups sugar
10 large egg whites
4 cups (8 sticks or 2 pounds) unsalted butter, cut into pieces
2 teaspoons pure vanilla extract
 
Directions
  1. Place sugar and egg whites in the heat-proof bowl of an electric mixer. Set bowl over a pan of gently simmering water, and whisk until sugar has dissolved and egg whites are hot to the touch, about 3 minutes. Test by rubbing the mixture between your fingers; it should feel completely smooth.
  2. Transfer bowl to mixer stand. Using the whisk attachment, beat on high speed until mixture has cooled completely and formed stiff and glossy peaks, about 10 minutes.
  3. Add the butter, one piece at a time, and beat until incorporated after each addition. Don't worry if the buttercream appears curdled after all the butter has been added; it will become smooth again with continued beating. Add vanilla, and beat just until combined.
  4. Switch to the paddle attachment, and beat on the lowest speed to eliminate any air pockets, about 5 minutes. If using buttercream within several hours, cover bowl with plastic wrap, and set aside at room temperature in a cool environment. Or transfer to an airtight container, and store in the refrigerator, up to 3 days. Before using, bring buttercream to room temperature, and beat on the lowest speed with the paddle attachment until smooth, about 5 minutes. This is one step that is crucial  is to beat the chilled buttercream to room temperate for the smooth finish on cakes.
 

Saturday, May 12, 2012

Varan Bhaat


One of all time favourite dish in Maharastrian meals is varan bhaat with hot ghee and vangi batat bhaji according to my DH. Today is one 'happy meal' kinda day for V. Recipe courtesy, dear M-I-L.

 Varan bhaat ani Vangi batat bhaji


Varan Ingredients:
 Toor daal 1 cup
ghee 1tbsp
turmeric 1/4 tsp
cumin seeds 1/2 tsp, crushed coarsely
hing 1/2 tsp
salt to taste

Pressure cook toor daal with enough water and cook thoroughly.
Mash the daal and add salt and half a cup of water to it. Bring it rolling boil and take off heat. Separately, prepare seasoning by heating ghee in a pan, add crushed jeera and hing. Take pan off heat and add turmeric powder. Pour seasonings to the daal and cover. Serve with rice and half a teaspoon of ghee.


Vangi batat


 Ingredients:
Small purple vaangi 6-8
potatoes 2-3
Onions- 3, finely chopped
jeera -1tsp, crushed coarsely
chilli powder- 1tsp
turmeric powder-1/2 tsp
sambar powder- 1 tsp
goda masala- 1 tsp
oil 2tbsp
salt to taste
coriander leaves to garnish

Cut each vangi lengthwise into 6 pieces. Cut potatoes to the same size as well.


Heat oil in a kadai and saute onions till translucent and slightly changes color. Add all the masala powder and potatoes. Roast till potatoes get a slight crisp at the edges and then add vaangi. Saute for a couple more minutes. Add half a cup of water, cover and cook on simmer till potatoes are cooked thoroughly. When done, take off heat and garnish with coriander leaves.

Thursday, May 3, 2012

Kadgi ani chane ghashi / kadgi ani thori ghashi


One of the easiest and most often cooked curry in the Konkani household
is this. Ghashi is what we call for the curry made with the basic ground coconut masala, one vegetable, one pulse followed by mustard seasoning. A simple, quick and a delicious one at that.

Most common combination is Black chana and  tender jackfruit or  sprouted green gram (moong) and tender bamboo shoot which is equally delicious. I believe that the combination is dependent upon the availability as fresh bamboo and the tender jack fruit are both seasonal and for this dish we cannot make do with the brine vegetable (In India, that is).


I have used kabuli chana as it is the one of the staple in my pantry and I make do with the canned kind when I'm pressed for time. Below is a picture of dried tuvar and jack fruit ghashi.


Iingredient's:
1 cup grated coconut,
1 tsp tamarind pulp
8 roasted red chillies
1 can jack fruit
1/4 tsp Methi seeds
1/2 cup Thori aka whole tuvar Daal or
1/2 cup Kabuli chana or Kala chana

For seasoning
2 tbsp oil
¼ tsp mustard seeds
2 sprigs curry leaves
2 red chillies

Soak thori/ chana in warm water for 6 hrs. Drain water and rinse a couple of times. Cook with enough water in the pressure cooker for 5 whistles till almost cooked (not completely soft as it has to further cook with the masala). Do not drain the water the pulse is cooked in.

Drain the canned jack fruit and chop the jack fruit pieces in two. Add it to the cooked chana and cook till soft. About 10 minutes.

Dry roast the red chillies and methi seeds. Grind it along with coconut, tamarind pulp and salt into a smooth paste.Add ground masala  to the kadgi and chana and bring the curry to a boil and simmer for 5 Min's. Take off of heat and season.

Temper by heating 2tbsp oil and when heated to a smoking point add mustard seeds, 2 red chillies and 2 sprig of curry leaves. Add it to the curry and cover. Serve with rice as a side.

 The picture of kadgi ani thori ghashi.


.
Substitute and make your own combo's

Pick one pulse and one vegetable
Thori --for--- black chana , whole vaal, Avro (Navy beans)
Kadgi --for--- Suran (Yam), green plantains, potato
I especially add extra Kadgi since we prefer more of them than pulses. so instead of 1 can, I usually end up with 2 cans.

Friday, March 16, 2012

Gosale upkari


Lunch thali: Surai sheeth, kolmbo, doNNe mirsange bhajo ani gosale upkari


Ridge gourd/ Gosale is always a 'two dishes out one' kind of vegetable. This gourd is always used after scraping off the ridges to make it  edible into any delicacy, be it in upkari (vegetable stir-fry), podi (deep fried )or cutlet. The ridges are then seperately made into a chutney or thambli  (same recipe, thinner consistency and with the addition of mustard and red chillie seasoning) depending on what the cook desires for the day. Today is a upkari and ' gosale shire/ghire chutney' day for me.


 Ridge gourd cut up


 Ridges removed for making the vegetable tender. The scraps are saved to make into a delicious chutney or thambli.


Ingredients:

Ridge gourd/ Gosale - 2, skinned and chopped
Mustard seeds- 1/2 tsp
red chillies- 2, broken
curry leaves- 1 sprig
coconut- shredded, about a table spoon
oil- 1 tbsp
Salt to taste

Heat oil in a pan. Temper with mustard seeds, red chillies, curry leaves. Add in gosale and cook (for  about 10 mins) covered without additon of water.  Add salt and coconut.As simple as that.

Friday, February 17, 2012

Tiramisu

 Among zillions of tiramisy recipes in the blogsphere, here's my 'go to' tiramisu recipe if I'm pressed for time is to make do with store brought lady fingers (gasp!), comes together in less than hour minus the 24 hr chilling period. A perfect  no fail recipe is always a favourite on in my list.  I would proudly serve this version of a  tiramisu to any Italian...thats how perfect these are!


Tiramisu
Serves 8
Note: For the best results, make this 24 hours in advance of serving

1 cup heavy cream
4 large egg yolks
1 tablespoon dark rum, Amaretto, Kahlua, or Godiva liqueur (I used dark rum)

1/3 cup superfine sugar
1 2/3 cups mascarpone, soften at room temperature for 1 hour
1 batch lady finger cookies from here or 3 packages (31/2-ounce kind) lady finger cookies
3 cups very strong, cold coffee
1 tbsp Cocoa powder, for dusting
1 tbsp instant coffee powder, for dusting

In a large, cold bowl, whip the cream to stiff peaks. Refrigerate until ready to assemble the tiramisu.

In the bowl of an electric standing mixer, combine the egg yolks, rum and sugar. Beat the mixture at a high speed for 2 minutes. It should be quite thick and leave a trail when the beater is lifted away. Place the softened mascarpone in a large (seperate) mixing bowl, and gently fold in the beaten egg-and-sugar mixture.Now, fold in the chilled whipped cream. Cream is now ready for layering.

Dip each ladyfinger briefly into the coffee, and arrange in rows on the bottom of a cake pan 'the kind that had easy release lever on the sides used for cheese cakes. Line the sides and bottom with parchment paper. Any bakeware dish works as well (preferably 8" but I used 6-inch round in my case and ended up with leftover so I had to make 3 individual cups as well) or pyrex baking dish. Gently spread an even layer of the mascarpone/cream mixture over the ladyfingers, and top with a second layer of coffee-dipped ladyfingers. Spread with the mascarpone mixture. You can make a  third layer of ladyfingers, and end with a layer of the mascarpone but the taller the tiramisu, more temperamental it gets. So newbies stick to double layers.

 Cover the pan tightly with plastic wrap, and refrigerate for no less than 24 hours, and up to 36 hours. Dust generously with cocao and coffee powder and  cut into 6 wedges for serving (having kept aside  3 of them made into cups, I got one extra serving for taste testing).

Optional, a dollop of whipped cream, chocolate wafers or sticks and a  strawberry.


Recipe # 2  from 'taste of home' magazine for icecream lovers
Tiramisu icecream dessert

Ingredients:
•¼ cup chilled whipping cream
•1 tsp confectioners’ sugar, sifted
•About 2/3 cup good quality coffee ice cream
•About 2/3 cup good quality vanilla bean ice cream
•4 savoiardi (Italian crisp ladyfingers), each broken into quarters
•½ cup freshly brewed espresso
•A small piece of bittersweet chocolate.
Preparation:
Whip the cream with sugar until it just holds medium-stiff peaks. Set aside for a moment. Divide the coffee ice cream between the glasses, top with the vanilla ice cream, then put the ladyfingers over the ice cream. Pour the hot espresso on top and dollop with the whipped cream. Grate some chocolate over the cream. Serve immediately.

Kolmbo

Kolmbo, a konkan variation of Madras sambar with freshly roasted and ground masala with many other vegetables than the regular tomatoes and onions like that of idli sambar. This kind is mainly used as a lunch/dinner side and has marked as one of the main dish for a konkani lunch. The vegetables that goes in this dish are drumsticks/mashinga sang (a must), tindora/gherkins, brinjal/vaingaNa  along with the usual potatoes, tomatoes and onions and are not limited to the mentioned few. In my moms kitchen, carrots, beans and cauliflower are a staple in kolmbo but V thinks that English vegetable were not an addition in the authentic kolmbo. My childhood memories of kolmbo were all the vegetables I hated; stem of cauliflower & knolkol too. The ground fragrant masala is what matters here. All else is secondary, I say!


Kolmbo (this one has only batato ani mashinga sang), surai sheeth, miriye pappod, mirsange happol, batate happol

Ingredients:
Roast:
Oil 1 tbsp
red chillies- 8-10
chana dal- 2 tbsp
urad dal-2 tbsp
coriander seeds- 2 tbsp
jeera- 1 tsp
methi seeds- about 15
turmeric- 1/2 tsp
hing- 1/2 tsp

Grind the roasted ingredients with the following
1/2 cup coconut
1 sprig curry leaves
tamarind paste- 1tsp
salt to taste


Vegetables:
Drumsticks- rough skin peeled lightly
potato- 1 small, cubed
brinjal-4, quatered
pearl onions- about 15
tomato-2, finely chopped
cauliflower florets-about 2 cups
Tindora - about 10, quaterd
carrot -1 cubed

Seasoning: oil, mustard seeds,2 sprigs of curry leaves, 1/4 tsp hing.
cilantro for garnish

Pressure cook 1 cup of tuvar dal.
In a big stock pot, cook all the vegetables till half done, add the ground masala, tamarind paste and salt. Bring it to rolling boil. Simmer & cook till all the vegetables are cooked through. Add the seasoning and garnish with cilantro.
Serve with rice.

Saturday, August 27, 2011

beetroot Upkari

  • Rooting for  ruby red beetroot, here's a quick & super easy side, nothing glamorous or fancy - just a good for you 'unmessed with' beets.  I've been making repeats with a couple of delicious ways to serve these healthy addition to our diet. A sweetish hot beet upkari  &  oven roasted beets are 2 favourite side dishes devoured happily by both my kids. Did I mention that I have one picky kid & another extremely picky?!
  •    A week  ago few of beet shreds went into the red velvet cake as a trial & I was very proud that the kids had no idea that they were eating healthy. I almost feel powerful to have complete control of what goes into their bodies...well, almost! In near future I do have plans of making a raitha & a cold soup as well. Did I mention that I have a few golden beets growing in my kitchen garden?


  Ingredients:
  • beets - 4, peeled, cut
  • mustard seeds - 1/8 tsp
  • red chillies 3
  • curry leaves- a sprig
  • coconut - 1tbsp
  • salt

 
  • Heat oil in a pan. Temper with mustard, red chillies & curry leaves. Add the matchstick beets, salt & half a cup of water. Cover & simmer for 15 to 20 mins till completely cooked. Garnish with grated coconut.

Monday, August 15, 2011

chudi pooja

 I am having a great summer so far.
 A relaxing 2 week road trip with the kids went e-x-t-r-e-m-l-y well. Driving around with kids for hrs together is not as daunting (this time around) as it was until a few years ago. Thank's to all the fast food chains for 3+ meals (parental judgement is futile here), nintendo & gameboy which were used to the max. Meeting up & staying over at a few of the closest family we have here in the U S as well as visiting a few places around at temp destination were all going as planned. What a perfect way to make use of hot summer days & vacation, I thought.....only until I came home to a minor setback of a break-in. It brought all the smiles down & scared my babies for sure! It was pretty hard to assure the kids that all would be okay, the very first night back home while I was scared just as much... but materials can always be replaced. Luckily we moved past the fear pretty quick under the circumstances and planned to have the house ready for the Chudi pooja this coming weekend.


Here's how the front of the house looks today.
I'm happy how my little tulsi plant was decorated for the day.
I couldn't be happier that the chudi pooja and lunch we hosted  went really well. Just plain old laughter, good food and might I add a perfect, amchi meal, if you ask me! It was a beautiful day weather wise & the special shravan celebration for the sumangali friends made my house feel blessed as well.


Menu for the day was: Dalithoy, tendle bibbe upkari, jainavro ani kadgiche tepla randay, pulikoddel, duddhi upkari, batato ani karathe podi, valval, kolmbo ani sheeth.


 A friend who recently returned from India got us kele halvo ani kashi halvo which we relished like there is no tomorrow. Thank you Prabhu family!


My darand looks very festive today along with my walkway.

 A beautiful Sunday came to an end with melodious songs from Vinaya Shenoy and  our tabla artist, Rajesh Pai who religiously entertain us at every occasion with his music perfomance.

Monday, July 4, 2011

Mysore masal dosa

 A peek at what was for breakfast this morning! Yum!


 A mental image of a  hearty breakfast  to be put out to relish (and savour) drives me out of bed on this special day. I'm just about ready for the brunch I'm hosting this weekend with a new zest as the arrival of a close friend brings out enthusiasam in my otherwise lazy holiday morning. This meal is also a favourite when done right. So pressure's on!

It's about time to get started with the prep to have it ready for the hungry bunch (who are so lucky to get hours to lounge on bed) so I'll be done  before they get to the kitchen. It would be wonderful to have a few things prepped but I'm not a a fan of cooking half  the food previous eve & the rest of it early in the morning to save time later...seriously, there's restaurants for that. Good things come to those who wait( especially this case)! This dry garlic chutney  also called losuni puddi (dry)chutney though is an exception.  
The regular masala dosa  is getting a zing today, transforming  from the usual to the infamous Mysore masala dosa with the chutney.  
 Recipe remains the same to make masala dosa, potato bhaji & the corriander chutney. The dry garlic chutney ( warmed in a microwave for a minute to moisten & releast oil from the coconut)smeared on the dosa ( while still on tava) as it is getting crisper by the minute is the only addition . All these sides takes  atleast a couple hours of prep into making them from the kitchen to table.  All well worth! 


 .

Saturday, May 21, 2011

Shevai ani batate vaagu

Thanks to Deepa & Rajesh Pai who treated us to this amchi feast last evening.  I could tell by Rajesh's  enthusiasm that he was about to debut a  new dish which made this much awaited meet up all the more special.
Dinner was made with great dedication taking care to perfect the shevai (string hoppers) as well as making a innovative chicken dish (yet to be named ) to go along with the string hoppers. Veg lovers  had the option of batate vaagu, karathe nonche & karanda nonche, just arrived from India...yum! What a delish!
Our impromptu meet ( impromtu for us, I think it was pre-planned by the Pai's) made me realise that we must really mean a lot to them as they went all out with the food prep for a simple casual meet.  Either way,  good food to go with great company, who's complaining! ;)
I'm glad to have had the best shevai available to me in the U S from the Pai kitchen.
(Chicken recipe will be borrowed &  posted upon request via mail).

Wednesday, April 6, 2011

strawberry jam sugar cookies

These are especially made for our 'girls night in' event for my favourite girls ( Reshma, Deepa, Vinaya, Divya)coming over tomorrow eve. The cookies are made from my simplest  sugar cookie recipe of all with the addition of a drop of strawberry jam in the middle. Making these were a breeze. note to remember is to chill the cut out cookies & then bake as they spread super easy. It was tasty nonetheless.

Monday, March 28, 2011

Key Lime Cookie


Cookies:
2 cups all purpose flour
3/4 cup unsalted butter, at room temperature
1 cup granulated sugar
zest of 2 key limes
2 egg yolks
1/4 tsp. vanilla extract
1 TBSP key lime juice
Pinch of salt

In a medium bowl combine the sugar and the lime zest. Using a stand mixer with the paddle attachment, on medium-high speed, cream together the butter and lime scented sugar until light and fluffy, about 3 minutes.
Add yolks one at a time, scraping down the mixer after each addition. Mix in vanilla and key lime juice and beat for another 30 seconds on medium-high speed.
Add salt and flour and mix on low speed until ingredients are fully incorporated.

Divide dough into four logs. Roll so that they are easy to slice. Wrap them in plastic or wax paper and place into fridge for 1 hour. You can go as long as overnight if you have stuff to do.

Preheat oven to 350F. Remove cookies from fridge. Slice cookies to about ½ inch thick. Place on a parchment lined (or you can use baking spray) cookie sheet and space about an inch apart. They don’t really spread out all that much.

Bake for 14-16 minutes depending on the size of your cookies. They aren’t going to be a super soft cookie. More of a shortbread bite if you will. Let them cool, drizzle  glaze.

 Glaze
2 cups powdered sugar
1/3 cup key lime juice
Zest of 1 lemon
Whisk the sugar and juice together until it’s a thick but pourable glaze. Pour over cookies. Let glaze set up, sprinkle (don't know what the right word is) zest and eat.

Friday, March 18, 2011

Toasted Ravioli

1 bag  Cheese Ravioli
1 cup Italian Style Bread Crumbs
2 tsp Italian seasoning
A pinch of paprika powder
1/2 tsp salt
1 egg
Oil, For Frying

 Cook ravioli until al dente about 5 minutes. Cool.
 Have seperate bowl for egg (beat well) & bread crumb mixture ( paprika, bread crumbs & Italian seasoning & salt).
 Dip ravioli in beaten egg and then bread crumbs mixture. Do this twice to have a thicker coat. Set aside on a plate. Gently dip into hot oil and fry until golden brown, about 2-3 minutes.
 Serve with marinara sauce.

Thursday, March 17, 2011

bhajji Upkari/ Amaranth

Ingredients:
A bunch of amaranth leaves, finely chopped
1 tsp mustard seeds
3 dry red chillies,  broken
2 tsp oil
1sprig curry leaves
salt to taste
Heat oil in a skillet, temper with mustard seeds, curry leaves, red chilli pieces and wait till seasonings begins to splutter. Add in greens & salt. Stir, cover & cook on reduced heat for about 10 minutes. The very little bit of water in the chopped leaves are just enough moisture to cook this. Take off heat.
Optional; garnish with grated coconut. (Omitted here)

Wednesday, March 16, 2011

Baingan patiala


Ingredients:
4 Purple Chinese eggplant, cut lengthwise, cut 1" pieces
1 medium onion, chopped
2 medium tomatoes, finely chopped
2-3 green chillies, slit
1" piece ginger, grated
2 cloves garlic chopped
1/2 tsp cumin seeds
1 tsp amchoor powder
1 tsp red chilli powder
1/2 tsp turmeric powder
salt, to taste
2 tbsp light cooking oil

Saute eggplant pieces in a large skillet till lightly roasted. Set aside.
Heat a little oil in the skillet, saute onions,cumin seeds, spices, green chillies and ginger and garlic for a few minutes. Add in tomatoes and cook on medium heat till the mixture is almost dry and leaves oil from the sides.

Mix in fried eggplants, salt, and let cook a few minutes till eggplants are done through.