Wednesday, March 16, 2011

Baingan patiala


Ingredients:
4 Purple Chinese eggplant, cut lengthwise, cut 1" pieces
1 medium onion, chopped
2 medium tomatoes, finely chopped
2-3 green chillies, slit
1" piece ginger, grated
2 cloves garlic chopped
1/2 tsp cumin seeds
1 tsp amchoor powder
1 tsp red chilli powder
1/2 tsp turmeric powder
salt, to taste
2 tbsp light cooking oil

Saute eggplant pieces in a large skillet till lightly roasted. Set aside.
Heat a little oil in the skillet, saute onions,cumin seeds, spices, green chillies and ginger and garlic for a few minutes. Add in tomatoes and cook on medium heat till the mixture is almost dry and leaves oil from the sides.

Mix in fried eggplants, salt, and let cook a few minutes till eggplants are done through.

Tuesday, March 15, 2011

Sannapolo

2 cups rice
1/4 cup toor dal
1/2 cup coconut, grated
6 or more dry red chillies
1/4 tsp tamarind pulp
1 cup cabbage/ paddole seeds/ onion/ mashingasang phool- finely chopped
salt
oil to fry

Soak rice and dal for a couple fo hours. Grind coconut, tamarind, chillies to a fine paste using a little water.
Add rice and dal and grind further to make a coarse paste . Add salt. Use one of the following; cabbage with onion, snakegourd seeds, drumstick leaves or flowers.

Heat a griddle with oil, pour a spoonful of batter and spread with the spoon or flatten with hand to a thick dosa.  The beauty of these are the ease making it no-fail side dish  for the novice. Flip over the dosa and fry on the other side till lightly roasted. Serve hot with dalithoy and rice.

Wednesday, March 2, 2011

Alle piyavu ghashi

Ghashi inspired by my favourite Prabhu family, Roopa's signature dish. It tastes heavenly coming out of her kitchen than mine.  I love the simplicity of this dish, mildly spiced, eye pleasing ( I promise a better pic than the one below) & super-easy to make.
 Here' was my attempt to get as close to the original dish as possible. Turn-out was pretty good considering my poor cooking skills when  it comes to fish. It was way better a day after except that, I knew that I could never reheat it right without breaking the fillets apart. Pretty darn tasty, though.

Ingredients:
8 fish pieces (best with cod, tilapia, pomfret)
1 cup grated coconut
1 onion finely chopped
1" piece ginger, julienned
7-8 long red chillies
Tamarind extract
3-4 green chillies, slit
1/4 tsp turmeric
1 tablespoon oil
Salt


                                                                              ( I promise 'someday' I will load up a better picture of my alle piyave ghashi to do justice to this delicioius curry)

Method:
Grind grated coconut, red chillies and tamarind extract into a smooth paste.
In a pan heat oil and add chopped onion, green chillies and  ginger , saute for a minute. Add  turmeric, ground coconut masala, 1/2 cup of water, salt and bring it to boil. Place the fish and simmer the heat to the lowest heat setting of your cooking range and cook it for 8-10 minutes covered. Serve the curry with boiled rice for the authentic jalke randey taste.

Wednesday, January 26, 2011

Chow chow bath

A classic breakfast eats that is a perfect combination of savoury & sweet satisfies the palette for eyes & taste buds. Chow chow bath is  a must have for all uppitu & sheera  lovers  all over Karnataka.


Sheera/ kesri bath
Ingredients:
1 cup Rava/ Sooji
1 cup Sugar  
4 Tbsp Ghee
Water 2 cups
Saffron strands 1 pinch
cardamom powder  1 pinch
cashews 10
raisins, 10

Method:

In a hot thick bottomed pan pour ghee and roast rava, raisins & cashew nuts on a medium heat till aromatic. Add sugar, cardomom powder and  saffron strands mix .
Pour in hot water, stir, cover & cook for few minutes (about 7-10) and turn off the heat.
A well done sheera leaves the sides of the pan without sticking to the bottom & has ghee holding together as a whole.

 Upittu/ khara bath
Ingredients:
1 cup Rava
1Onion, chopped
4 green Chilies, chopped
1/2 tsp Cumin seeds
1/8 tsp Mustard seeds
1/4 tsp Urad Dal
1/4 tsp chana dal
1tsp peanuts
1 pinch turmeric powder
1 sprig curry leaves
Cilantro

Method:

Roast the rava a teaspoon of oil till a slight change in color & aromatic. keep it a side.

Heat the pan with oil add mustard , cumin seeds, curry leaves, urad dal, chana dal and allow them to splutter. Add peanuts & onion and fry till translucent. Add a pinch of turmeric powder, 2 cups of water & salt and bring to boil. Once water is boiling add roasted rava and stir continously till most of the moisture has evaporated.  Garnish with cilantro, cover & turn off the heat.


Serve a cupful of both with sev mixture on the side.

Friday, January 14, 2011

Roasted tomato soup

What would winter be without soups to warm us up.  A perfect soup according to me, is one that does not have corn flour for thickening, no color added  to beautify and simply unmessed with.
This one is one such kind.


With January being a national soup month &   with the icy weather we've been having,  its a perfect time to make some soul warming hot & savoury soup. A simple comfort in a bowl & (the roasted aroma of tomatoes should be a good enough reason)  saves me from camping out next to the stove to cook a big amchi meal on this lazy  Friday eve.


This pureed soup doesn't require any recipe to be followed. Ingredients are vaguely mesured and is pretty much of roast, puree, water down to right consistency, season to your taste kind. This one's off  of a magazine read  a while ago which I mentally promised to make it, as it had just a handful ingredients that gets all tossed in an oven, pureed in a hand blender, a sprinkle of paprika, done!
I wish I had the info handy to give the rightful credit for this quick to whip goodness. Here goes!

Ingredients
4 tomatoes (I had plum on hand), quartered
1 small onion, quartered
3 garlic clove, peeled
2 tbs olive oil
1/2 teaspoon salt
1/8 tsp paprika or pepper
2 shallots, finely chopped
Salad croutons and cilantro, optional

Method:
Line the sheet pans with parchment. Place the tomatoes, onion and garlic in the  baking pan.


 Drizzle with 1 tsp oil (reserve the other tsp of oil for seasoning). Sprinkle salt and  toss to coat. Bake at 350° for 1 hr. Turn sheet pan halfway once. Cool slightly.


In a stock pot, heat 1 tbsp oil, saute shallots


 add in the roasted tomatoes and a cup of water to puree in the hand blender.


 Add enough water to bring it to desired consistency ( I added 2 cups) and bring it to a boil.

chunky rich soup


Serve the soup with a dash of pepper, a piece of toasted baguette/croutons, romano cheese, pepper as much as you can take (mine's laced with pepper, just the way I like it) and cilantro.  Slurp away!

Wednesday, January 12, 2011

Gujarati Dal

 1 cup Tuvar dal
1 tomato, diced
 3 cloves garlic, crushed
1" stick ginger, crushed
3-5 green chilli, slit
1/4 tsp mustard seeds
1/2 tsp turmeric
1/2 tsp coriander powder
1/2 tsp jeera powder
1/2 tsp red chilli powder
1/4 tsp hing
2 tsp lemon juice
salt
oil
 curry leaves
coriander leaves

Pressure cook dal  with a tablespoon of oil & salt. Pour into a saucepan with 2 cups of water and bring it to a boil.  Simmer on low flame for 5 minutes.

Temper with heating oil in a pan,  add mustard seeds, hing , garlic, curry leaves, splutter for a minute add  tomatoes, turmeric powder, red chilli powder , ginger & all other spice powder and sauté until the tomatoes are soft. Add the tempering to the cooked dal. Squeeze lemon juice & garnish with chopped cilantro.

Chicken Ghee Roast

A  sense of pride drapes over me on getting positive results from this visually pleasing, tastebud tantalizing hot chicken recipe that I was holding back, unsure of the authenticity. As a recent convert to flexitarianism,  meat wasnt someting that I truly enjoyed eating. My meat consumption is strictly dependant if there is no vegetarian option available to me.  This dish is an exception, though! I relished this for the first time at my latest trip back to homeland. I for one never order chicken dishes for myself at any restaurant but the perfect blend of heat & spices had me hooked on it.

The three ladies who have cooked this exclusively for me  after hearing me gloat about the ghee roast I  ate, made it with three different sets of ingredients, leaving me with more doubts than before. After playing around a few different times, experimenting with addition & omission of dhaniya jeera powder, having more freedom to tweak the measurements  in my own kitchen to the family's taste gave  rise to a perfect dish.
Happy, happy joy, joy!

 On a slightly different note:  A dearest cousin shared her precious 'ghee roast powder' too. Precious, I say since you realise the value only when you are outside India, that she graciously parted with. I believe her's was S.R.R brand which is awesome in itself. I attempted making my own powder coming close with comparison and was sort of pleased.  YAY! Win-win.
Recipe will be up soon.

Here's a keeper recipe that is going to be prepared more often due to the simplicity of the method & ratings given by the family.

Chicken,  1 lbs
 Red chillies about 30 ( mine was a mix of byadi for color & habenero for heat)

Tamarind paste 1/2 tsp
Cashew nuts 5, soaked in warm water
yogurt 1/2 cup
Garlic gloves 6
Lime  juice- 1 tbs
Turmeric powder - 1 tsp
Coriander Seeds - 1 tsp
Cumin Seeds - ½ tsp
Methi Seeds - ½ tsp
Ghee- 1/4 cup
 Garnish options; sliced onions, green chillies,Coriander leaves, lemon wedges

Method:

Marinate chicken with lime juice, yogurt, salt  & turmeric.

 Dry roast coriander seeds, cumin seeds & methi on low heat till aromatic. Grind it with red chillies,  cashew nuts, garlic & tamarind to a thick paste.

In the heavy bottomed pan, heat ghee and the ground masala.  Saute the masala stirring every few minutes till the masala separates from the ghee and the pungency from the garlic disappears .  Add chicken. Once the dish comes to a boil  simmer on low heat till the chicken is cooked thoroughly .

At this point the masala  has reduced  making the masal stick to the sides of the chicken leaving the ghee seperated from the dish. Perfect! Transfer to serving dish, garnish with sliced onion & green chilies.

Saturday, January 8, 2011

Lady fingers/ Savoiardi

The  couple days of break from school for kids, the cabin fever & us snowed in from the blizzard has been good for me baking wise. I finally got to crossing off more from my 'to-do's' as well as making savoiardi. And why not, it takes only basic ingredients + it is fun to pipe them in neat rows & the kids love to sprinkle sugar & watch them dissappear. I now wonder why I waited so long to make these delicate fingers.

In the past, I have spent a lot of time at the bread isle & the bakery section looking for lady fingers at every trip at the grocery. If I did get my hands on them, they looked very flat & underbaked. Making them sounded  much simpler than going in search of these.

I followed the trustworthy The Cordon Bleu At Home . 
Makes about 36 fingers


Ingredients:
Eggs, 3 separated
Granulated Sugar, 6 tbs
Cake Flour, sifted, 3/4 c
Confectioner's Sugar, 6 tbs

Method:
Preheat the oven to 350 degrees, then brush 2 baking sheets with softened butter and line with parchment paper.

Beat the egg whites with a whisk or electric mixer until stiff peaks form. Gradually beat in the granulated sugar and continue beating until stiff peaks form again; the meringue will be glossy and smooth..
Lightly beat the egg yolks till you see ribbons like above. Gently fold into the meringue with a wooden spoon.  Don't overfold or the batter will deflate and lose volume resulting in ladyfingers which are flat and not spongy.
Sift the flour over the mixture and fold in gently.

Pipe the ladyfingers: Fit the pastry bag with the large plain tip and fill with the ladyfinger batter.
 Pipe strips of batter 5 in. long and 3/4 in. wide diagonally onto the baking sheets, leaving 1 to 2 in. between each strip.


 Sprinkle half the confectioner's sugar over the ladyfingers; wait 5 minutes and sprinkle with the remaining sugar. Sprinkle half the confectioner's sugar over the ladyfingers and wait for 5 minutes. The sugar will pearl or look wet and glisten. Now sprinkle the remaining sugar. This helps to give the ladyfingers their characteristic crispness.
 Holding the parchment paper in place with your thumb, lift one side of the baking sheet and gently tap it on the work surface to remove excess confectioner's sugar. I skipped this step so as to not disturb my perfect looking biscuits; besides they didn't effect my final product.


Bake  for 10 min (without opening the oven door). Then, rotate the baking sheet so the ladyfingers color evenly, bake another 5 minutes.

Remove the ladyfingers from the baking sheet with a metal spatula while still hot, and let cool on a rack.

Wednesday, January 5, 2011

Clementine muffins

The abundance of clementine, this season & my love for these sweet delicious plump citrus is making its way in my kitchen in muffin forms. A perfect moist muffin with a light citrus glaze...what's not to love?! This is absolutely a must on my menu for when I have my girls over for some tea in the near future. All the more  craving for making this with navel oranges with dried cranberries, meyer lemon with poppy, tangerines... it sure got the creative juces flowing, allright!

 Ingredients:                                          glaze:
3 cups AP flour                                        1/2 cup confectioners sugar
3 clementines                                            2 tbs clementine juice
2 cups Sugar                                            mix together.
2 Eggs
2 sticks butter
1 tsp baking powder
1 tsp Vanilla extract

Yields around 12 muffins.

Preheat oven to 350F
Peel (also de-seed if you have the seeded kind) clementines &  chop ( roughly) all segments. Reserve juice. Ignore the pith for 2 reasons: one being that it will eventually blend in; second being that its natural fiber.
Beat   butter & sugar  till the sugars have somewhat dissolved & light & fluffy.  Add in eggs & mix just till blended.You will see a change in color. Mix in  vanilla & clementines with its juice. Add the flour &  baking powder and mix  just enough to wet the dry ingredients (but make sure not to overwork the batter). Pour into a paper lined muffin pan.
 Bake  for 15-20 minutes, until you insert a knife in the middle and it comes out clean.

Glaze them with the recipe above (or a mixture of lemon juice and powdered sugar) by pouring a  couple spoonful & letting it drizzle the sides for a fancy effect or eat them  just plain.

Monday, January 3, 2011

Mascarpone & the culinary resolution

This year the one thing that I really want to achieve in my 'cooking life' is mastering a few cooking techniques that I have been letting crust on the back burner. I have this weird habit of trying to re-create dishes I love eating out, more so if I expect a dish to turn out a certain way especially the look, the taste, the texture; let's say the whole works has ruined the good mood that was set before the meal. So, if it doesn't turn out good; there's a problem - I have to make it to see what could go wrong. If if does turn out good; I want to be able to make it just the way it is. Either way, The love of food wins over my will.

This eve, my love for tiramisu won over & here I am, making the mascarpone that will be ready to be used to go with the sponge.

Here are a few things  to attempt:
 Mysore paak
lady finger sponge
pastillage flowers
tomato sauce
rumali roti
custard
graham crackers
tomato soup(yeah, pathetic!)
and so on...

Here's a few more that were a failure in the past:
yogurt ( to be a desi & not know this...gasp!)
a perfect tiramisu

chicken makhni
scala loaf
 

Source: Giuliano Bugialli's Mascarpone
from his book "Giuliano Bugialli's Classic Techniques of Italian Cooking"

Ingredients:
1 quart fresh heavy cream
1/4 tsp. tartaric acid (available from pharmacies and some grocers)

Method:
Place cream in a glass casserole or bowl, and place casserole into a larger pan.
Add cold water to a larger pan. Place the pan over medium heat and bring the cream to a temp of 180 degrees (75-80 Celsius). Use a candy thermometer, stirring every so often with a wooden spoon.
As soon as the cream reaches the EXACT temperature, remove from the heat, add tartaric acid, and stir with a wooden spoon for 30 seconds.
Remove glass casserole or bowl from the larger pan, and stir another 2 minutes.
Line a fine-mesh basket or strainer with thick cheesecloth and pour in cream mixture.
Allow to stand for 12 hours in a cool place or on the bottom shelf of the refrigerator.
Prepare four 9-inch squares of cheesecloth.
Divide mascarpone in four.
Place a quarter of it on each square of cheesecloth and fold like a package, without tying it.
Place packages on a plate and refrigerate for another 12 hours before using.


How To Substitute For Mascarpone

Sometimes, it's a lot easier just to substitute. Tiramisu creators have used ricotta or cottage cheese as successful substitutes by whipping the cheese until it is smooth.

Other sources have created their own substitutions. In the Epicurean Chef's Forum, "Kim" posted the following: "I found a substitution that worked okay is 8 ounces of softened cream cheese, plus 3 tablespoons of sour cream, plus 2 tablespoons of heavy cream (liquid, not whipped).

In "The Cook's Thesaurus," the following are suggested:
(1) Blend 8 ounces softened cream cheese with 1/4 cup whipping cream, or
(2) blend 8 ounces softened cream cheese with 1 tablespoon cream or butter or milk,
(3) Blend 6 ounces softened cream cheese with 1/4 cup butter and 1/4 cup cream
Use within one week

Avro Saar-upkari/ kulitha saar-upkari

 In my house, the easiest way to get my family to eat healthy is to bowl them over is with a soup that is pretty much a simple but forgotten saaru's :  tomato saaru, limbiye saaru, rasam & saar upkaris. So here are a couple of the most nutritious of them all - kulithu/ horsegram  saar upkari & avro saaru upkari.  Prep for all saar upkari's are the same except that avro/ navy bean cooks much faster and doesn't require as much soaking like the horsegram.
Avre saar upkari (pic 1) Kultha saar upkari (pic2)


Kulithu/ horsegram 2 cups
red chillies 3
garlic 3 cloves
salt
oil 1 tbsp

 Soak the  gram overnight. Pressure cook kulithu with  about 3 times as much water for about 10 minutes.( 5-8 whistles).  When the pressure is off,  add salt to the gram  and simmer to thicken the stock. Thickening this enhances the flavour. ( At this point, we can remove kuluthu to make seperate upkari or for koddel or leave it as is and season it,  Some also remove the kulithu by straining and continue with the further reduction of liquid to make it kattu saaru which is tasty in itself without any additional seasoning). 
Temper by heating a tbsp of oil, crushed garlic & red chillies.  When the garlic have been roasted, add it to the saaru & turn off heat.

Thursday, December 30, 2010

Cranberry Shortbread Bars

As a last post for the year, an appropriate dish would be a sweet & tart squares that is specially made for the town librarians as a treat for the new years, while it is still warm. Overtime, they have been accustomed to my baking trials & assure me that they would definitely be a regular & recommend my baked goodies to other townies when & if I open up my patisserie. I consider that as a sweetest words, a support, a push from friends that boost up this aspiring baker's ego.

So here's the square all ready beautiful just as is for a short ride to the library.


Source: Lawrence, Sue. 'On Baking'. Kyle Cathie Limited. London: 1996.
Makes about 16 square bars.


Ingredients:

Cranberry Filling:
8 ounces (2 1/4 cups) fresh cranberries
2/3 cup granulated white sugar
3 tablespoons water

Shortbread Bars:
2 cups all-purpose flour
2 tablespoons cornstarch (corn flour)
1/4 teaspoon salt
1 cup unsalted butter, room temperature
1/3 cup light brown sugar
1 tsp vanilla extract


Preheat oven to 375 degrees F (190 degrees C)
Butter or spray with a non stick cooking spray a 9 x 9 inch pan (Mine was a pie plate).

Cranberry Filling:In a medium sized saucepan, place all the ingredients. Then, over medium-high heat, cook the ingredients until boiling. Continue to boil the filling until it becomes thick and syrupy, about 5 minutes. Remove from heat and let cool while you make the shortbread.

Shortbreads: In a bowl sift the flour, cornstarch, and salt.
In a (separte bowl) electric mixer, cream the butter until smooth.
Add the sugar and beat until smooth (about 2 minutes). Beat in the vanilla extract. Gently stir in the flour mixture just until incorporated.

Evenly press two-thirds of the shortbread into the bottom of the prepared pan. Then evenly spread the cranberry filling over the shortbread base, leaving a 1/4 inch border. With the remaining shortbread dough, using your fingers, crumble it over the top of the cranberry filling. Then lightly press the dough into the filling.


Bake in the preheated oven for about 30 minutes, or until golden brown on top.

Remove from oven, place on a wire rack, and while still hot, cut into 16 squares if made in a square pan (or 16 wedges in a circular pan like me). Allow to cool completely in pan.


G's note:
The shortbread tasted amazingly apt for the filling. For a sweet toothed girl, the sugar needs to be incresed just a tad. So next time, 1 cup of granulated sugar should work it magic.

Sunday, December 26, 2010

Nutella chocolate Cookies

I'm on a roll,  cookie baking fest is going full-on. Having a nutella-crazy little kid, experimenting anything with it or chocolate for that matter is easy. There's the inspiration right there!
These turned out so good that we decided to share it with Santa. How generous of us!


Ingredients:½ cup unsalted butter, at room temperature
½ cup granulated sugar
½ cup firmly packed light brown sugar
½ cup Nutella
1 egg
½ tsp. vanilla
1 ½ cups flour
1 tsp. baking soda
¼ tsp. salt
1/2 cup chopped chocolate bits (I used Giraldeli milk choc)

Preheat oven to 350F.

Cream butter and sugars in a mixer on high speed,  about 3 minutes, until light and fluffy.
Add the egg, vanilla, Nutella and mix well.
Add the flour, baking soda, and salt and mix on low speed until all the ingredients are incorporated. Increase the speed to medium and mix just until the dough is smooth. Fold in chocolate chips.
Bake 6-7 minutes. Let cookies cool about 5 minutes and transfer to a rack to cool completely.

Christmas cake/ Plum cake

 Here's our gingerbred house for this year!

Christmas cheer follows w-a-y after the holiday. A whole month of baking, making experimental goodies & being in the spirit all of that doesn't end yet, for this baking lunatic.
I have a couple more days of celebration still in store for my kids including a second gingerbread house ( first one was from a pre-made cookies, that doesn't count so Im getting my over-acheiver wind in me in attempting a house from scratch)

This week has lots in store for us. M also is trying his hand at a few more kinds of cookies to bake before the year ends since his whoopie pies were a big hit among his friends. With the vacation week, we can never have too many things to do at home since  mommy's 15  free minutes  or freedom/lazing on the sofa = reruns of "what do we do, now?" by my very easily bored kids.

 The snowstorm past weekend was a blessing in disguise for me, for a change being snowed in was a break from the usual grocery trip, the library, chauffeuring the kids to play dates & such. On the con's side though: the DVD's have been overused, board games are overused & ripping of the sides & I'm noticing that my family is constantly hungry. Is it because it's cookie season?

Let me hold on to the beauty of winter, the shimmering  tree  lit till the month end at the very least & my oven will be used once everyday till we run out of sugar or flour.  I still have 2 more friends who  missed  my cake this season. Today is a perfect day to bake up another batch of Christmas cake just for the pic purpose. This time a sheet cake, a muffin tray and a small 6" pan will be a perfect size to share.

(My round cake went to the Uttagi's party) here's a pic of the cake squares saved to share with the neighbour & for my V.

Ingredients
Candied citrus peels, raisins, marashino cherries, dried cherries, cranberries, currants, raisins, dates - make 3 cups(any combo)
rum – 1 cup
All purpose flour – 3 cups
Baking powder – 1 tsp
Butter – 2 sticks
brown Sugar – 2 cups
Granulated Sugar – 1/2 cup
Eggs – 6
cashew nuts, walnuts, raisins - about 10 each
All-spice powder - 1 tsp
cinnamon powder- 1/2 tsp
Salt – 1 tsp
Vanilla essence – 2 tsp

Method:

Prep the cake pans: butter the pans,


dust the pan with flour,

then line a sheet of parchment paper around the circumference ( I didn't know how many inches of extra height so I made 6" over the rim...what was I thinking?) & the bottom of the pan( here's where I messed up, I didn't line the bottom since my cakes 'always comes out clean; but- not this
time around :(


 Note to self: Make time for this extra (worthy)step. Line the bottom of the pans!!!

Soak up the fruits with rum, cover & set aside in a dark cabinet for 3 days to up to a month in advance.( I soaked up mine a day before thanks givimg weekend to get all the babies drunk up so
4 weeks = pretty drunk up fruits...oh-la-la)


 .


Sift the dry ingredients: flour, baking soda, all-spice powder, cinnamon powder, salt. Add cashew nuts cranberries, dried dated, dried cherries to this.


Cream the butter with brown sugar till the sugar crystals have almost dissolved. Add eggs &vanilla extract. Whisk till blended.


 .


Caramelize the sugar, by heating 1/2 a cup of sugar in the saucepan with 1 tbsp of water on a medium high heat, without stirring. The purpose is to achieve a deep brown syrup. This will take about 10 mins.


.

Remove from heat, set aside for a couple mins & then add 1/2 a cup of water. Don't be afraid of the sizzle.


beat together: soaked fruits, dry ingredients, caramel syrup, creamed butter-sugar mixture.

bake: pour this into cake pans


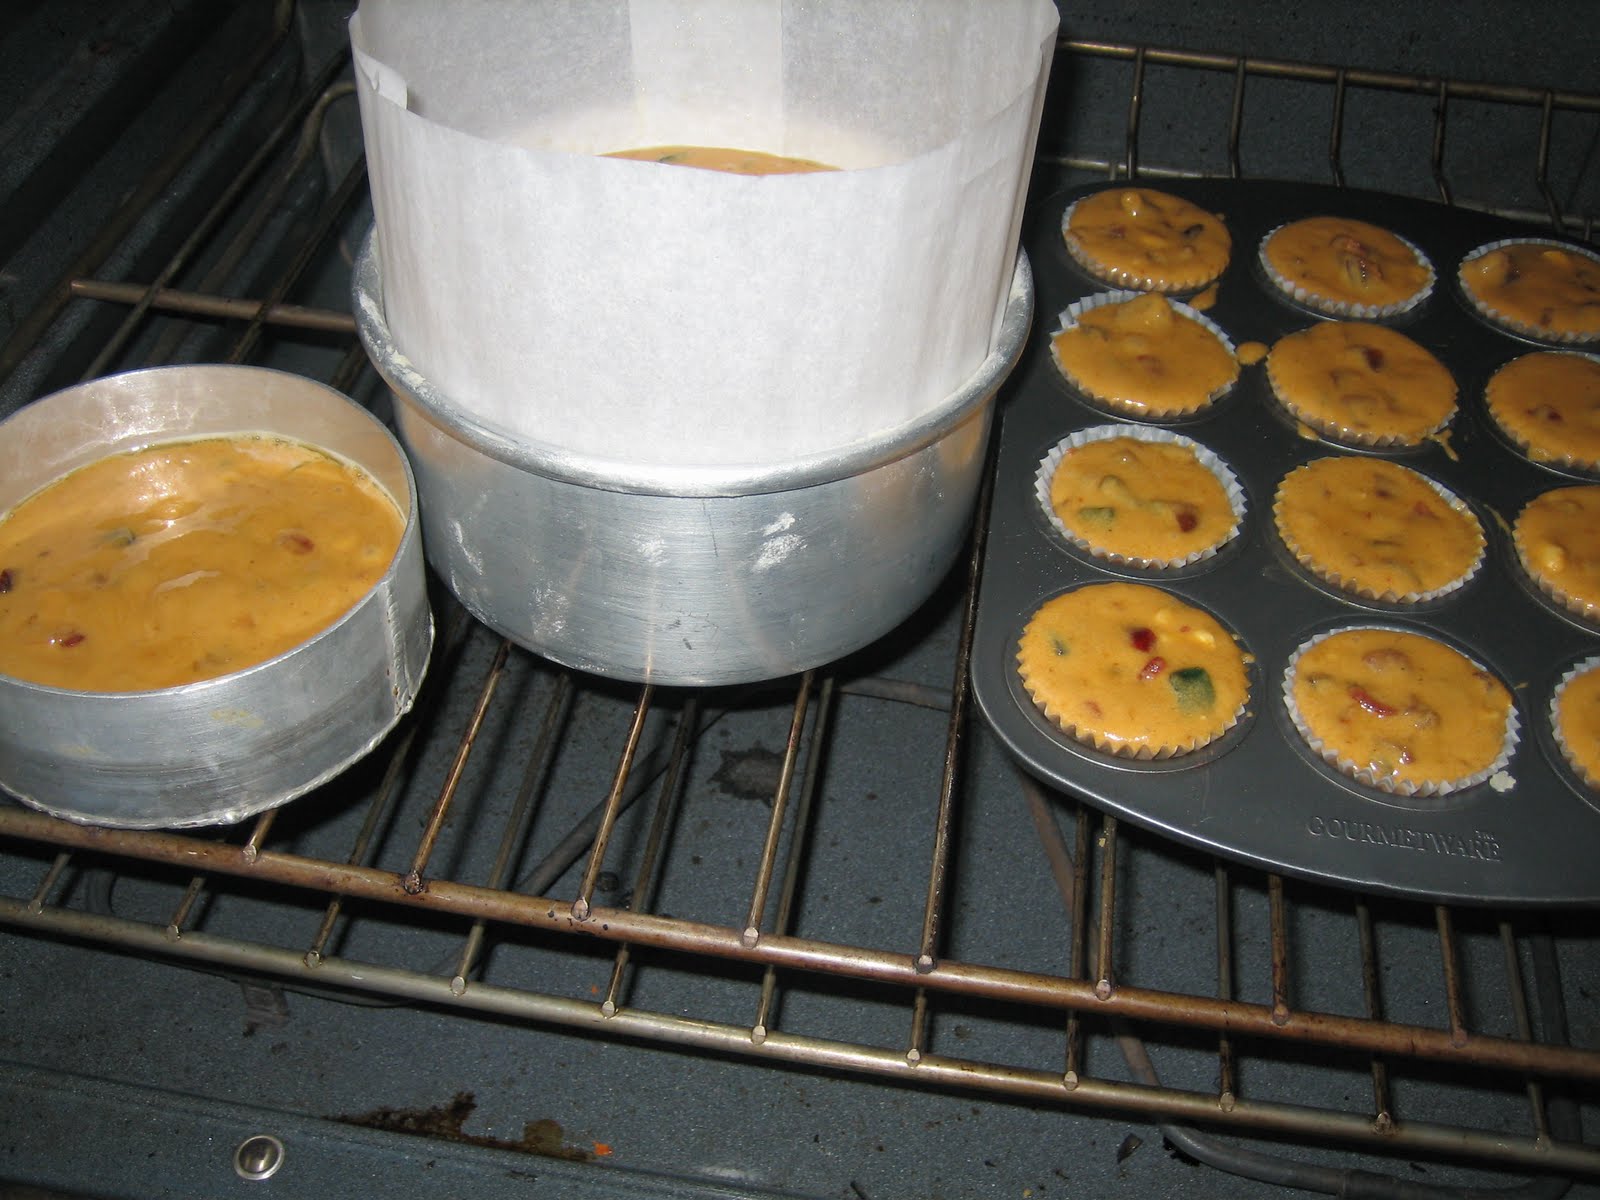
& bake at 300F for 2hrs for round pan, 1 hr for th sheet pan, 35 mins for mini muffins. This recipe yields 6x 4" round + 9"X13" rectangle pan (my first batch) OR 6x4', 12 mini muffins & a 2" round( 2nd batch).


Cool on pan for 15 mins. Invert on a cooling grid, remove the parchment paper. Cool completely.

Typically this cake is made a week in advance, every other day sprinkled with a couple teaspoons of brandy or rum and stored in an airtight container untill the christmas eve. Mine was presoaked dry fruits. I skipped this on purpose. End result was all worth the circus.

Friday, December 24, 2010

Sugar cookies

 A little string of Christmas lights  hung over my kids bed push me to bake a few sugar cookies using these colors as an inspiration. More cookies= more sharing, less guilt  while sneaking in a few of these goodies. Here's a simplest of all recipe to make this baking season fly by. 
A day spent in making these cookies went faster than imagined because there were absolutely no mess to clean up afterwards. Here's why- I didnt sift the flour, didnt roll out  the dough on the kitchen counter & there was no pile of crumbs on the floor. That's a motivation in itself!
A pretty simple one bowl, one wooden spoon recipe. Love it!

1 cup sugar
1 cup butter, softened
1 teaspoon vanilla
1 egg
2 1/3 cups  all-purpose flour
1/2 teaspoon baking soda

Heat oven to 375°F.

Beat sugar and butter with spoon until light and fluffy. Stir in vanilla, and egg. Add in flour and baking soda in batches scraping dough from the sides & mixing evenly. Shape dough by teaspoonfuls into balls. Place about 2 inches apart on ungreased cookie sheet. Flatten with bottom of glass dipped in sugar.

OR

 For roll out cookies, add 2 tbsp extra flour. Divide into two flatened disk, cover with cling wrap. Refrigerate for 15 mins. Roll out between 2 sheets of wax or parchment paper to 1/4"thickness & cut circles.

Bake 9 to 11 minutes or until set. Remove from cookie sheet to wire rack.

 Serve as is, glazed or cover with royal icing. For the glaze, mix 2 tbsp confectioner's sugar & 1 tsp lime juice well. Drizzle over cookies & sprinkle with sanding sugar or citrus zests.

Sunday, December 19, 2010

Kidiyo/ kul kul

The  most mischievious kid on the block is wishing the hardest for a ben-10 omnitrix.
Christmas is almost here, all my baking for the season is almost done. The wish list for Santa is getting erased and re-written several times this month. The cookies are being a staple in our diet these days too. 
How festive is that!
 Past few weeks I've had more of sheet pans, dough hooks, beaters & mixing bowls to clean than the actual dishes that gets involved in the desi kitchen.   I'm not complaining, at least till January, that is. Sweet smelling kitchen day in & day out. What's not to like?
 Letting myself ready for a  surprise venture, I head enthusiastically to make a Xmas delicacy: Kidiyo.


Kidyo, kul-kul was one kuswar( Christmas platter) goody that I always wanted more of as it was always over-excitedly welcome to our house which showed up only during Christmas.
Kuswar included rich plum cake, chakkuli, shev's, kulkul/kidiyo (litterally meaning worm shaped), guliyo ( a very hard ball of dough resembling marbles, rose cookies (a very delicate lacy flower made of fried batter) & nevreos (empanada shaped sweet filled fried goody).  As much as I loved all of those, I was biased to the infamous glazed kulkul/ Kidyo which were the first one to be relished by me. This was only eaten once a year, so you see the desperation?! I needed the recipe bad!
A few phone calls to my homeland, a few request to fellow foodie friends & few of my old friends who 'might' have made this in the past later & I was in no luck. I decided to go with the sweet thukudi recipe & gave it a shot with the hope that I just might replicate the delicacy that I once had more than a decade ago. Although there is no authenticity to this recipe it sure tasted pretty close. A close friend who made these recently had all the ingredients that I used but with more or less proportion. I was close to the actual recipe, after all.  I'm not  such a bad cook, I say!

Ingredients:
1 cup All purpose flour
1 cup Rawa
2 tbs Butter, chilled
1/2 cup coconut milk
1/2 cup sugar
Salt to taste
Oil for frying

Method:
Pulse dry in a food processor, add coconut milk a couple tablespoon at a time till the dough forms together into a soft ball. Keep covered for half an hour.

Heat oil for frying. In the meantime, make gnocchi shaped rolls by taking a marble sized ball of dough, flatten it on the backside of fork, pressing it from the bottom of fork tines to the tip. Roll it from one side (preferably bottom to top) as you are making ridges along the way till you get to the end into a tight curl (or they unfurl while frying). The kulkul should curl into a roll with ridges on their backs captured by the impression of the tines as tiny ridges will catch glaze later making these irresistible.

Cook the kul kul in batches by dropping them into the medium hot oil & frying it to a golden brown. They will let you know when they are cooked because they will float up to the top & stop sizzling. Fish them out of the oil with a slotted spoon. Drain on paper towels. Set aside to glaze..

For the glaze:
1 cup sugar, 1/2 cup water. Mix & boil the syrup for about 5 mins. This reduces the liq and leaves a one string consistency syrup. Dip a few kul kuls at a time, remove & let drain on a cooling rack. Make sure to separate any kul kuls that are stuck together(while they are still warm & fresh out of syrup). Cool, share & enjoy.

Concluding, the Christmas baking with kul-kul was a sweet ending & a successful at that.

Making kuswars were a breeze, making dinners were W-A-Y easier because I'd make a quick healthy 'make-do dinners', picture my table with pasta, garlic bread, pizza's, roasted vegetables, macaroni& cheese in a mix and match combo...what's hard about that! My carb-lover family loved the house always filled with smell of fresh breads
(sourdough, Italian & focaccia's), fried doughs (tukudi, kidiyo & mulikh) & cookies made everyday. It was good while it lasted. I now have to get back my cooking rhythm.

Chicken Bhuna/ chicken roast

Khawan (store brought) is a perfect roti for this chicken roast

  •  A very 'fine food critic, hard to please taste bud' of the family really approves that the justice has been done to this borrowed recipe. That says it all!


A quick chicken roast saves the gloomy sunday eve at the Rao household. I for one needed something 'desi', cooking at my stove top this evening. There is only so much take outs, food courts and frozen dinners one can eat all in one weekend.

 Picturing a rich spicy dish, loved by all (yeah, I want the kind I know for sure is a winner) that shouts 'eat me', on this cold cold winter eve, I set out to go to my staple bhuna/roast chicken.

 You know how Sunday eve sneaks up on us faster than we want it to arrive. I want it all to slow down, bring the family to the table for a favourite meal & conclude the leisure event-free weekend, happily.

Chicken bhuna is the name that is screaming loud, much louder than I can hear my thoughts. I shuffle through the papers of hand written recipes to find the one from years ago. I wish I remembered who I wrote it down from (ah, I miss my apartment friends), so I could giving her the right credit. I can't keep a good recipe down, so here I am sharing our family favourite.


Ingredients:
Chicken 2 lbs, cut into big pieces
Onions 1, diced
Tomatoes 4-5, finely chopped
Ginger -Garlic paste- 2tbs
Green chillies 4, slit
Red chilli powder 1 tsp
Coriander seeds - 2 tablespoons
Cumin seeds - 2 teaspoons
Blackpepper - 8
Garam Masala - 2 tablespoons
Kasuri methi - 1 teaspoon.
Oil -3tbs
Salt - to taste.
Fresh cilantro to garnish


Method:
Dry roast coriander seeds, cumin and black peppercorns and grind to a coarse powder.

Heat oil in a kadai over medium-high heat until very hot, add onion and saute till lightly browned. Add the ground spice powder,red chilli powder, ginger-garlic paste and green chillies and saute for a couple minutes.

Add tomatoes and salt and continue to saute till the tomatoes softens, add in chicken, lower the heat to simmer and continue to cook until the chicken are cooked through and the sauce has thickened coating the chicken (about 5 to 6 minutes).

Once the chicken is tender, add half a cup of water and cover the pan and simmer for 5 more minutes. At this point, chicken is cooked through and the gravy is thick and rich. Add in garam masala and kasuri methi (crush in your palms to wake up the aroma) and cook for 2 minutes .

Garnish with cilantro (I ran out justifying that kasuri methi was flavorful enough). Serve immediately with rice and roti.

Saturday, December 18, 2010

Nan Khatai

The past week my thoughts were consumed with all the goodies that I'd bake for Christmas kuswar( goodies platter). The only friend who bakes this season in the spirit of Christmas is a a fellow foodie, Mamata Uttangi. Her house is always loaded with baked/fried goodies..all home-made and in massive quantities. When I say massive, I mean m-a-s-s-i-v-e. Her cup for measurement is a 'ser/sher aka pav'. You get the point!


Last week, nan khatai was the highlight of the eve. Upon offering these, I shamelessly forgot to offer my husband one, ignored my kids & relished them like they were the first time I had laid my hands on them. You don't understand...If you are a materialistic person, in your view, these are like gold to me, let's say "a melt in your mouth" kind of gold. They were the first home-made nan khatais that tasted authentic & far better than bakery ones, tantalizing my nostalgic memory...teasing for more.

Would nan khatai purists be terribly upset for doing this to plain old cookies? (BTW,the crushed pistachio goes in before being baked so it adheres well as well as hides unsightly cracks ( two-fer again!)...if you are a perfectionist like me & don't like to see your goodies  crack on top while baking)


Recipe source: Mamata Uttangi
pretty easy '5321' in her words. So here goes:
Half recipe yields 72 nan khatais.

Ingredients:
5 cups maida/ AP flour
3 cups sugar
2 cups ghee
1 cup besan
Elaichi powder

Mix all of the above. Place on counter top (covered) overnight.


The next day, shape into balls, flatten them. Place on parchment lined sheet pan, bake at 350F for 10-15 mins. I say 10 minutes for just done ivory colored nan khatai. For brown edges 15 mins.


Turn them to see slight browned bottom. Cool.


Seriously, that's it!

FYI, no extra lbs were put-on in the making of these.
All my goodies were shared with Sheila, Indu, the librarians at my town & Mamta of course!

G's note:
*Mamta rolled it into a log and cut up discs & baked (considering the amount she had to tackle that day with a toddler in tow).
*I made half of the recipe, had all the time on hands to shape these babies and went a step further like mentioned above.